Configure SSO
Overview
Monospace supports single sign-on (SSO) through any OAuth 2.0 identity provider, including Google, GitHub, Microsoft Entra, Okta, Auth0, and GitLab. Members sign in with their existing provider account instead of a Monospace password. You configure providers per organization under Settings → Sign-in Providers, using a preset for a common provider or a custom configuration for any other.
Three behaviors shape how SSO works:
- Invitation-only. SSO does not create accounts on its own. A member must be invited first, then completes signup with their provider — see Invite members.
- PKCE is always applied (S256). There is nothing to configure.
- The client secret is write-only. Monospace never displays it again after you save it.
Before You Begin
You need:
- Organization administrator access.
- An OAuth 2.0 application registered with your identity provider. You exchange a callback URL from Monospace for a client ID and client secret from the provider.
Add a Sign-in Provider
Open Sign-in Providers
In the Studio, go to Settings → Sign-in Providers (under Access). The page lists every sign-in method for your organization. Select Add sign-in method.
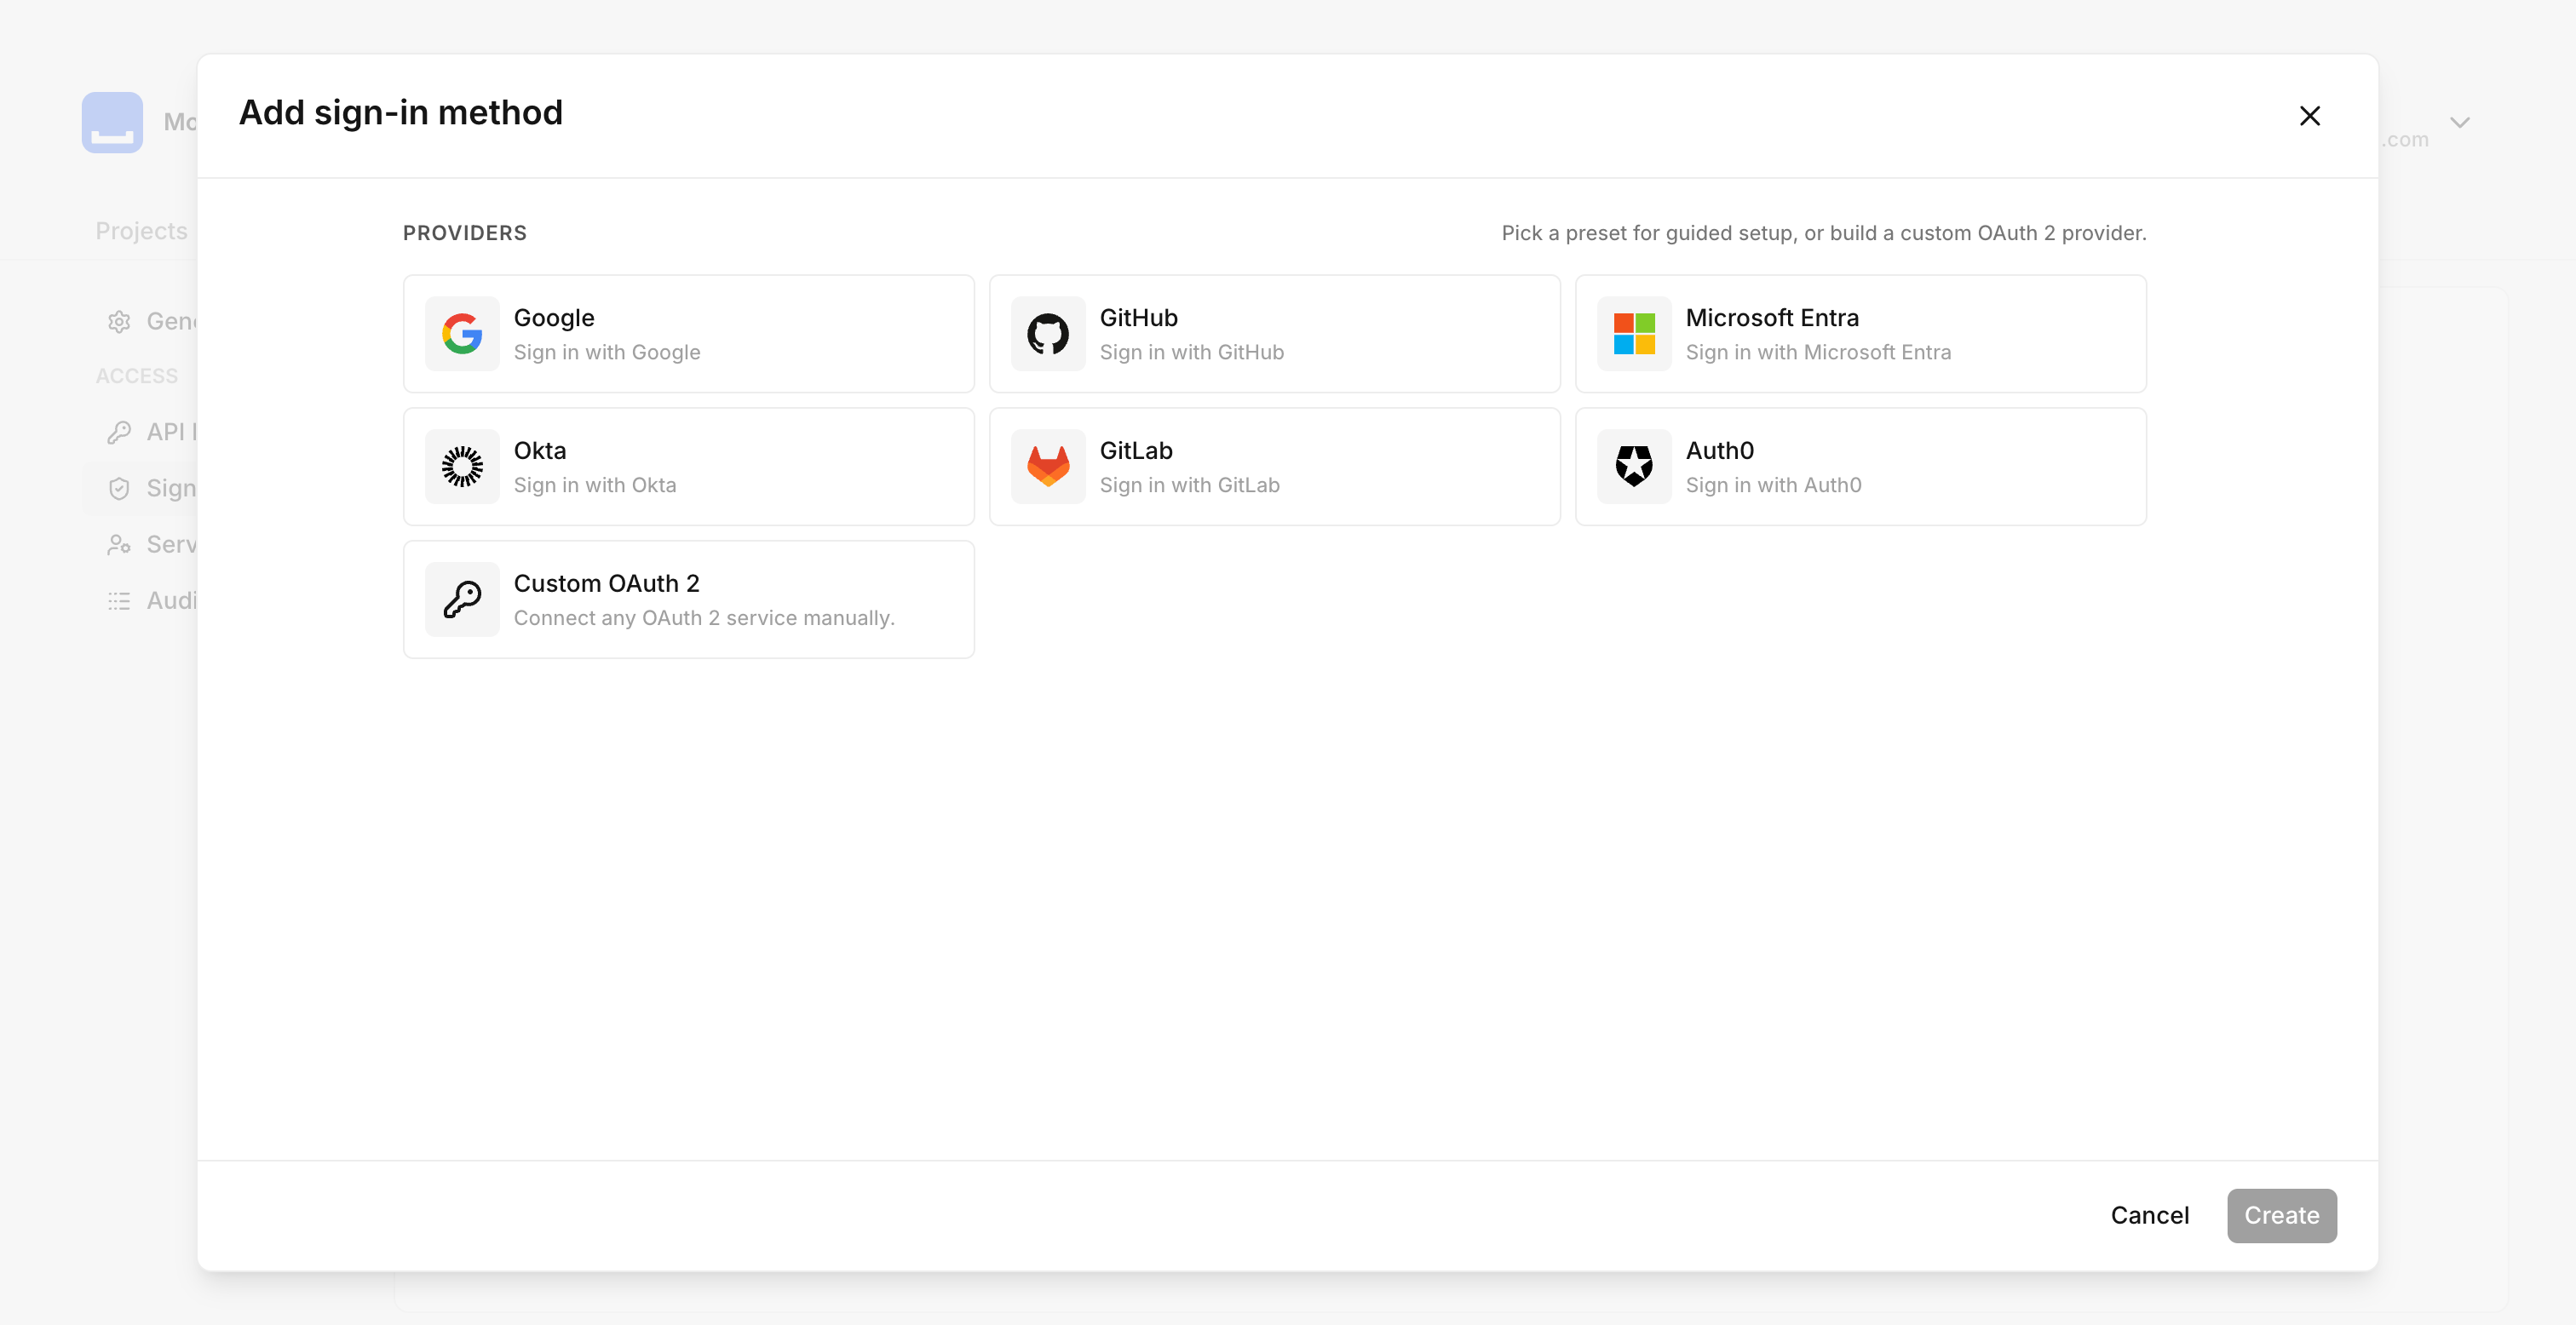
Choose a provider
Pick a preset — Google, GitHub, GitLab, Microsoft Entra, Okta, or Auth0 — or choose Custom OAuth 2 for any other provider. A preset fills in the endpoints, scopes, and claim mappings for you, so you only supply your client ID and secret.
Register the callback URL with your provider
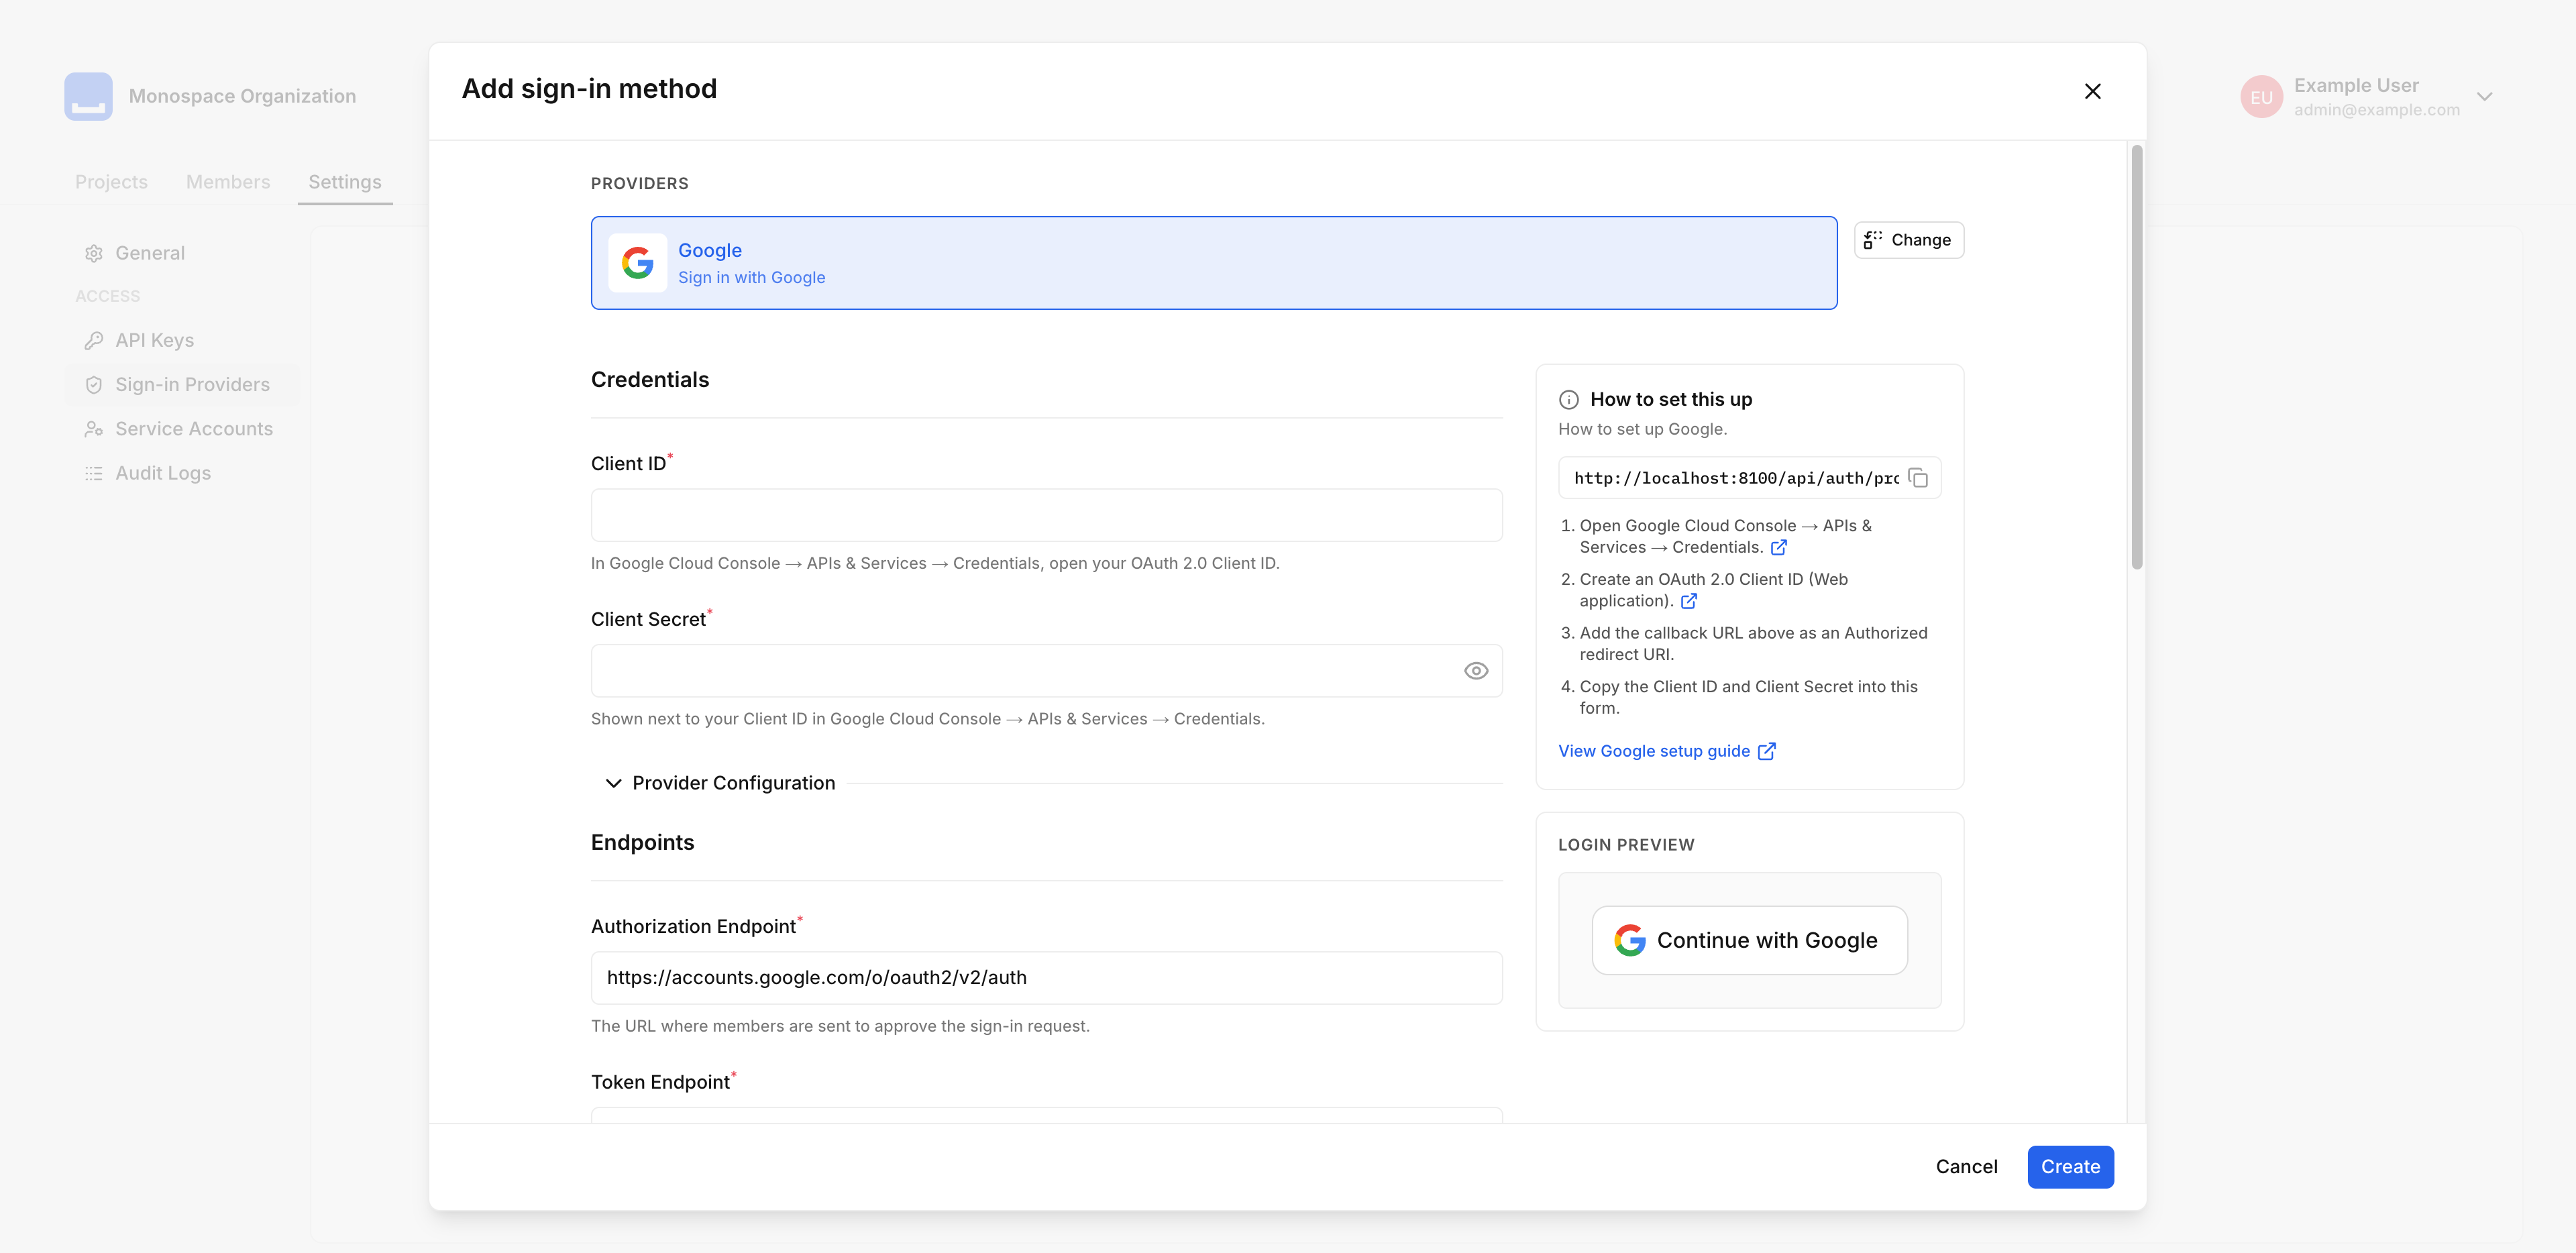
Choosing a provider opens its configuration form. The How to set this up panel shows the Callback URL alongside provider-specific setup steps. Copy the callback URL and add it as the authorized redirect URI in your provider's OAuth application. It has the form:
https://{your-instance}/api/auth/providers/{apiName}/oauth2/callback
The {apiName} segment comes from the provider's API Name — a preset supplies a default you can change; for a custom provider, set your own (letters, digits, underscores, and hyphens only).
Enter your credentials
Paste the Client ID and Client Secret from your provider's OAuth app. With a preset, the endpoints, scopes, and claim mappings are already filled in. For Custom OAuth 2, also enter the Authorization, Token, and Userinfo endpoints, the Scopes to request (for example, openid, email, and profile), and the Subject claim — and optionally the Email claim. See Provider Configuration.
Save
Select Create. The provider appears in the list as Active and shows on the login screen immediately.
Provider Configuration
These are the fields on the OAuth 2.0 provider form.
| Field | Required | Description |
|---|---|---|
| API Name | Yes | Short identifier used in the callback URL and login route. Letters, digits, underscores, and hyphens only. |
| Display Name | No | Overrides the label and icon shown on the login screen. |
| Client ID | Yes | The public identifier from your provider's OAuth app. |
| Client Secret | Yes | The private secret from your provider's OAuth app. Write-only — leave blank when editing to keep the current value. |
| Authorization Endpoint | Yes | Where members are sent to approve the sign-in. |
| Token Endpoint | Yes | Where Monospace exchanges the authorization code for tokens. |
| Userinfo Endpoint | Yes | Where Monospace reads the member's profile with the access token. |
| Scopes | Yes | The scopes to request. Add at least one. |
| Subject Claim | Yes | The profile field that uniquely identifies the external account. Supports dotted paths for nested claims, such as user.id. |
| Email Claim | No | The profile field containing the member's email. Supports dotted paths. |
| Extra Authorize Parameters | No | Key/value pairs appended to the authorization URL. Reserved OAuth parameters are rejected. |
The Subject and Email claims map fields from the provider's userinfo response to the Monospace member. Use a dotted path when the value is nested — for a response of { "user": { "contact": { "email": "..." } } }, set the email claim to user.contact.email.
Sign In
Each enabled provider appears on the login screen as a Continue with {name} button, using the provider's name and icon. Monospace highlights the member's last-used method.
Invite Members
SSO is invitation-only — there is no just-in-time signup. Invite a member to the organization or a workspace as usual; the roles you assign in the invitation are the roles they receive, not the identity provider. When the member opens the invitation, they enter their full name and select Sign Up with {provider} to complete signup.
Members who already have an account can link an SSO identity to it, then sign in with either method.
See Also
- System Endpoints — The auth-provider API, for scripting provider setup across environments
- Access & Permissions — Roles and entitlements, including who can manage sign-in providers
- Audit Logs — Account creation and membership changes are recorded in the audit log