Build an Application with AI Assistance
Overview
This walkthrough shows rapid, AI-assisted development on Monospace end to end — from an empty instance to a working application or internal tool. You'll wire up your AI coding agent with the official Monospace skill and MCP server, bootstrap a schema from your IDE, and build on top with the typed SDK.
The whole thing fits in about an hour, and you start from nothing. You don't need to bring an existing database or model any data by hand. Your agent creates the schema for you over MCP, and Monospace turns it into a governed API the moment it exists.
What you'll build: an internal restock console for an operations team. It surfaces products that have dropped below their reorder threshold and lets an operator file a restock request, reading live from your workspace through one governed API.
The Build at a Glance
| Stage | What you do | Rough time |
|---|---|---|
| 1. Start up Monospace | Launch the stack, sign in, create a workspace | 15 min |
| 2. Connect your data sources | See how Monospace federates databases you already run | 10 min |
| 3. Connect your IDE | Get an API key, install the skill, connect the MCP server | 15 min |
| 4. Bootstrap the schema | Let your agent build the data model from a prompt | 15 min |
| 5. Generate the SDK and build | Type-safe client, then the application itself | 15 min |
Once it's running, the Deploy with a Service Account bonus shows how to give the application its own scoped identity for production.
Prerequisites
- Docker Compose to run Monospace locally.
- Claude Code (the primary agent in this guide) or another MCP-capable agent such as Cursor or Codex.
- Node.js, for the SDK and its type generator.
- Optionally, a PostgreSQL, MySQL, or MariaDB database if you want to connect real data in Stage 2. The tutorial bootstraps its own schema, so this is not required.
1. Start Up Monospace
Follow the Quickstart to launch the stack with Docker Compose. In short:
docker compose up -d
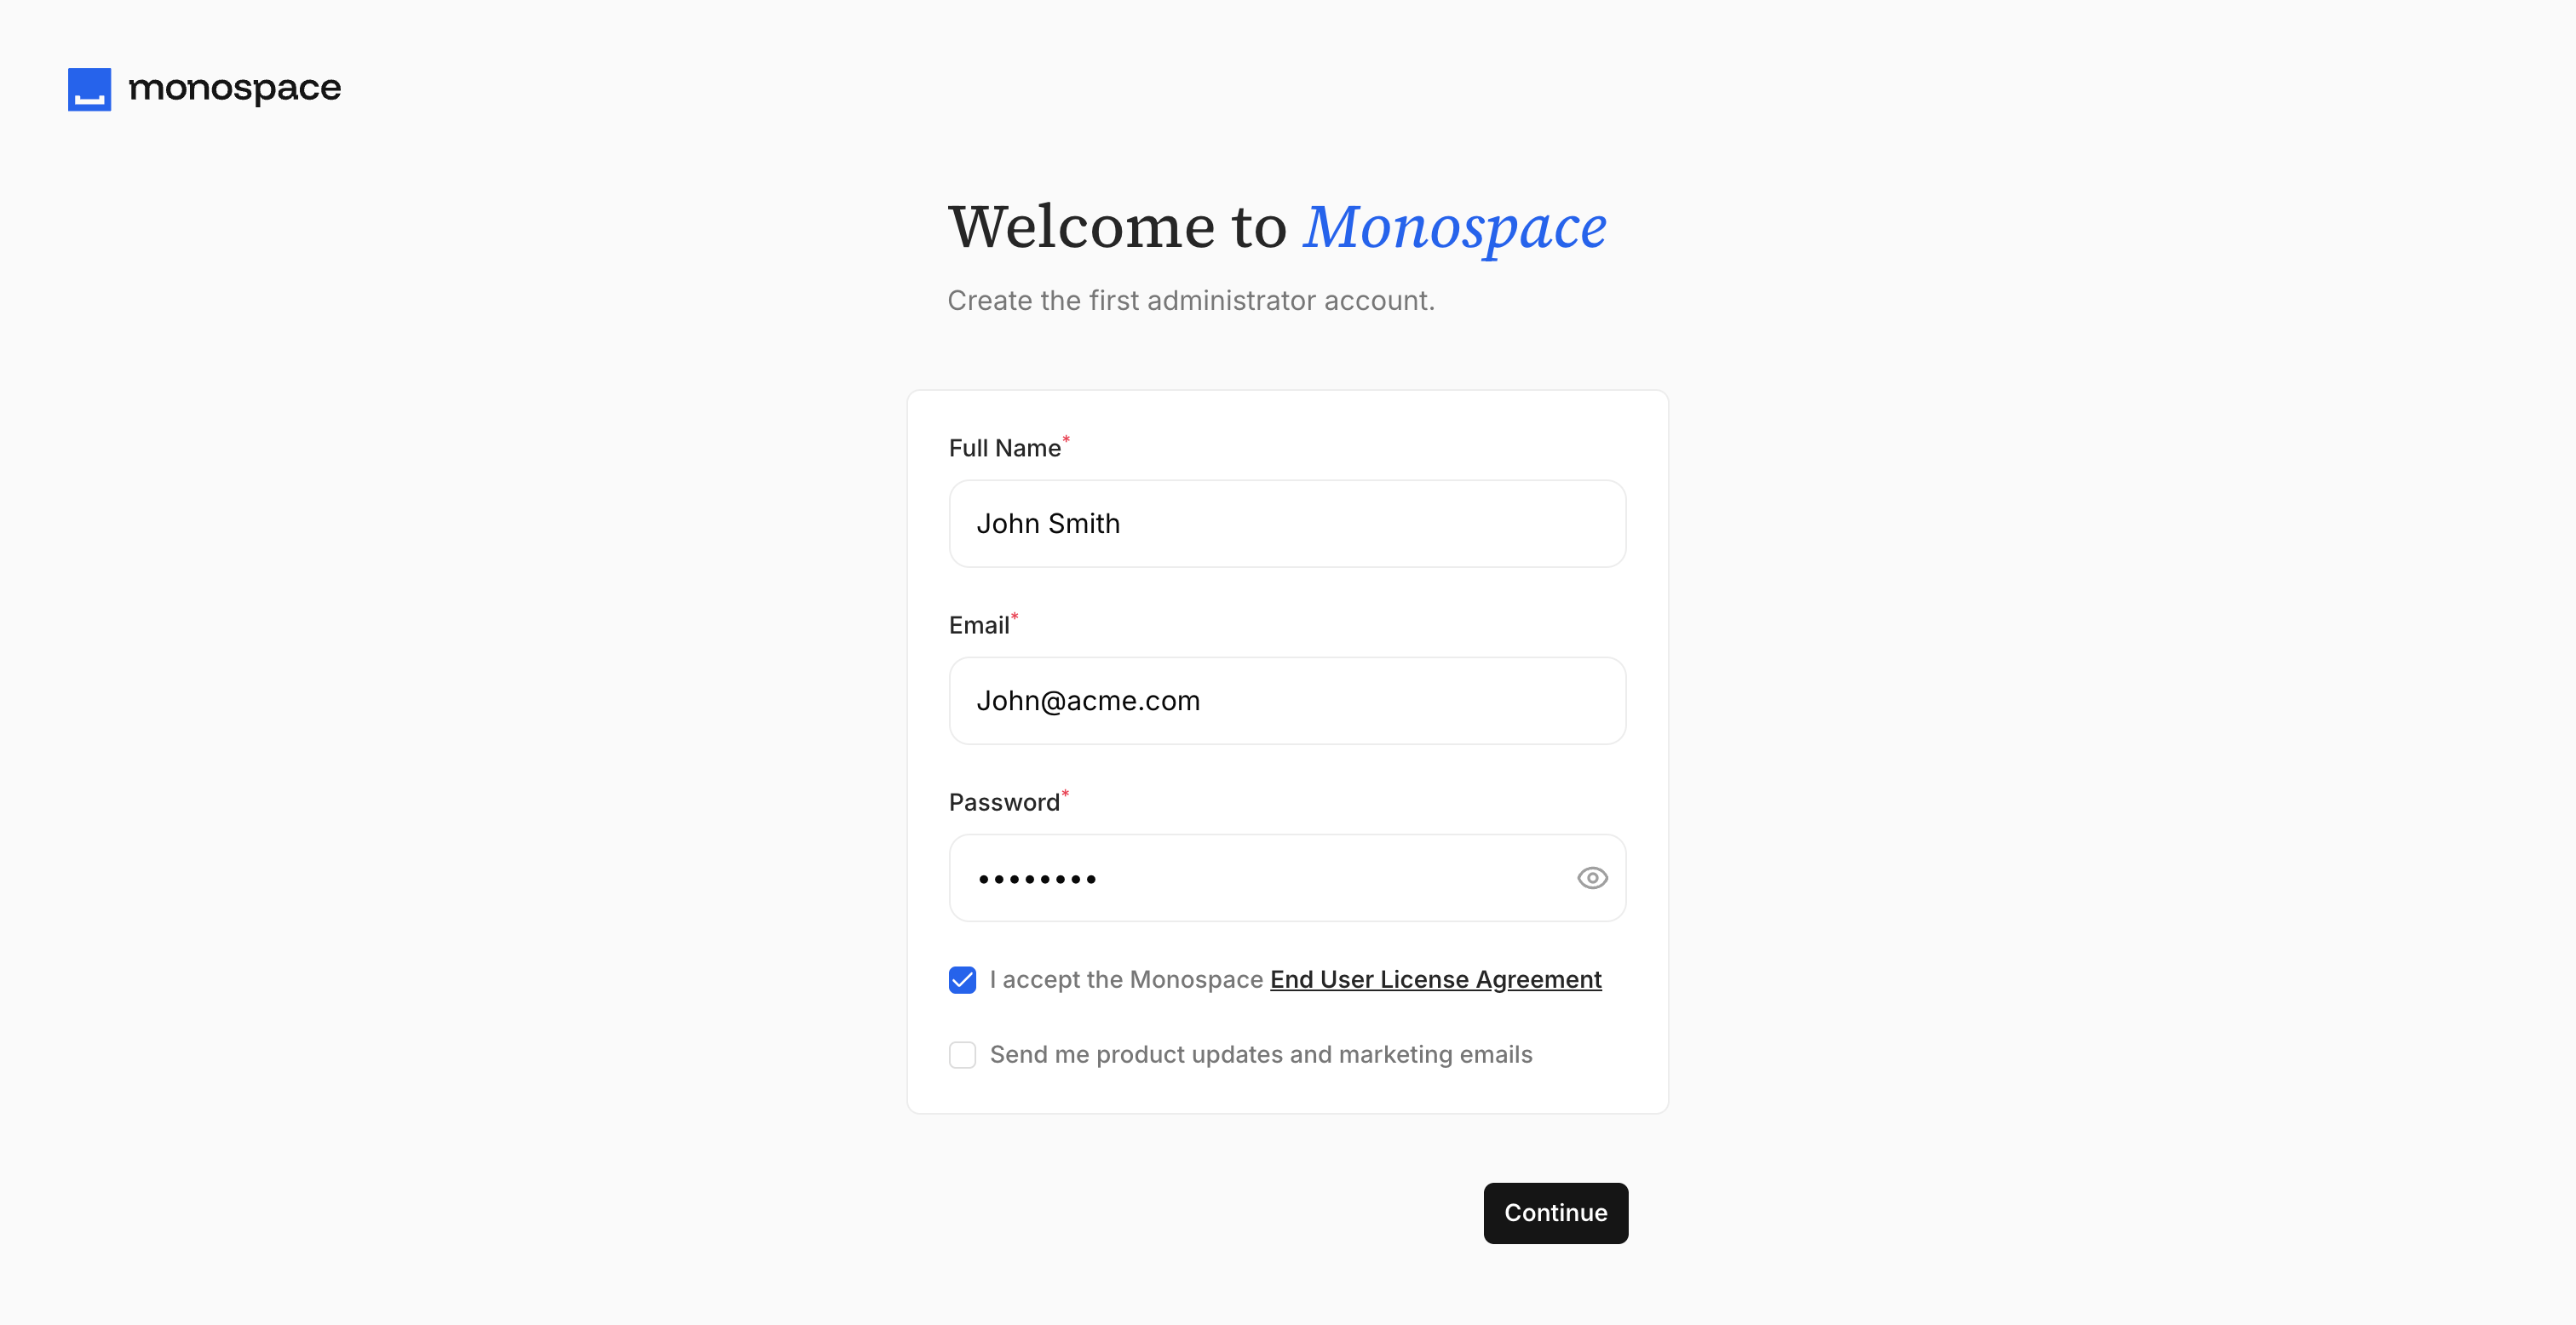
Once the containers report healthy, open the Studio at http://localhost:8100. The compose file sets no admin credentials, so on first run Monospace greets you with an onboarding screen. Create your admin account there, then sign in.
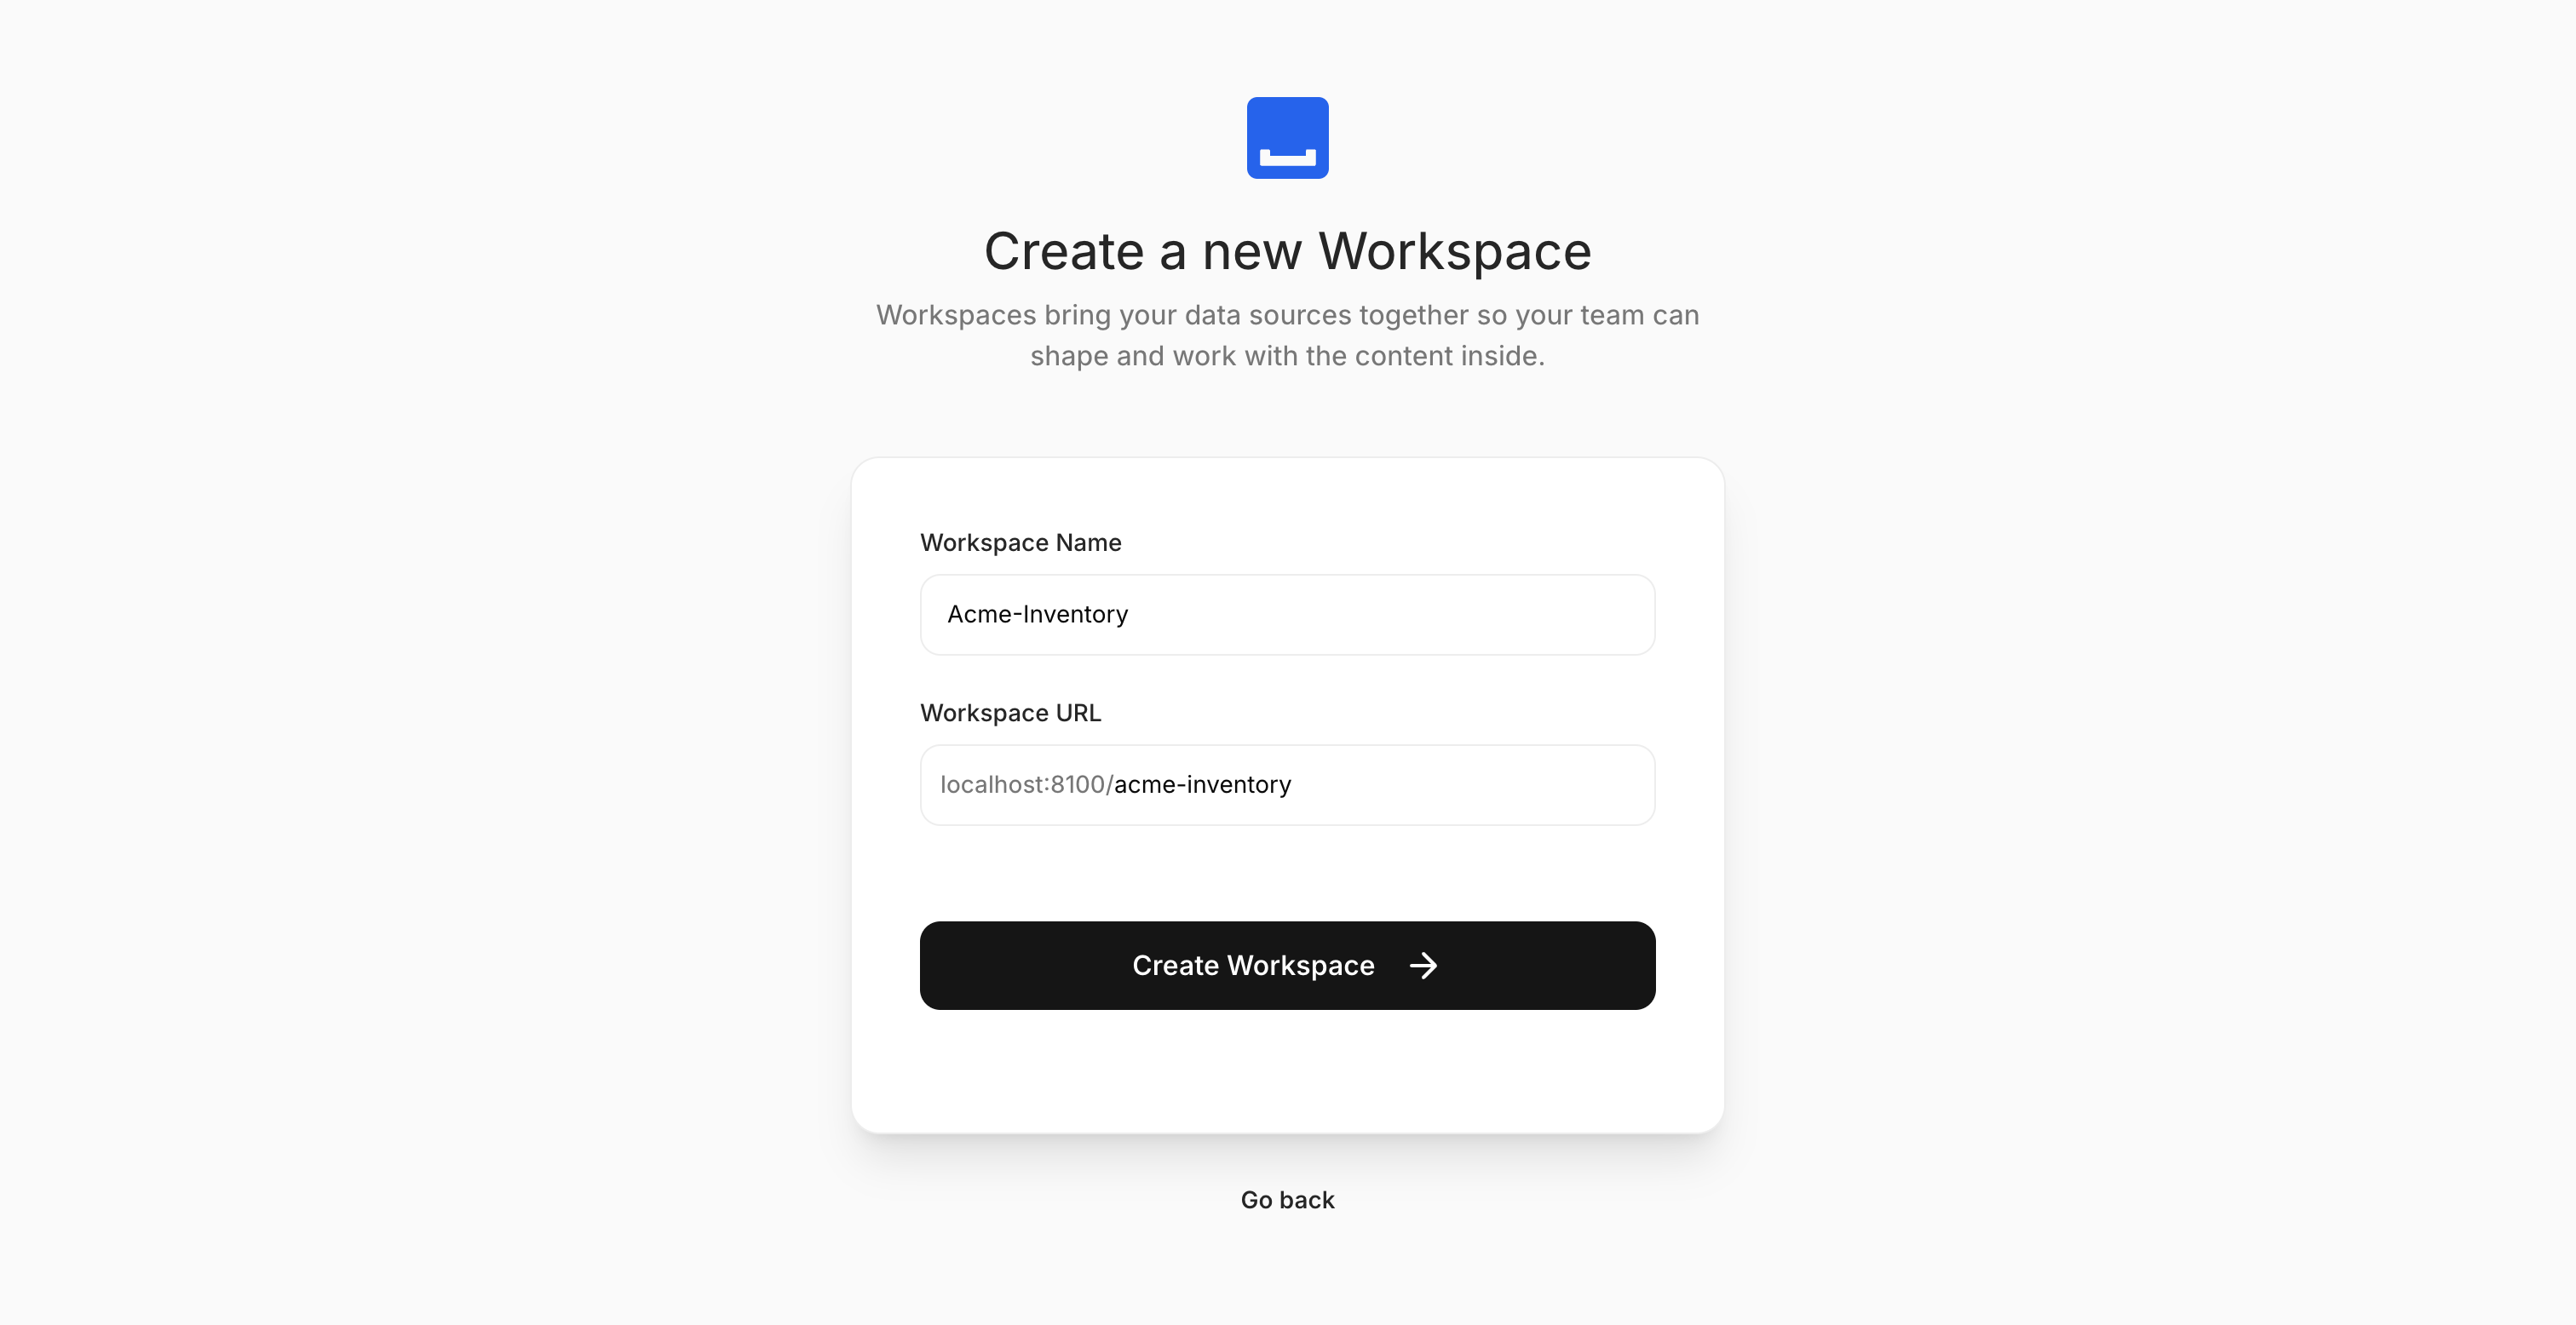
Your organization is the top-level container, representing your company or team. Inside it, create a workspace for this application. Name it Acme-Inventory and give it the URL slug acme-inventory. The workspace is where your schema and data source connections live.
http://localhost:8100 for your host.2. Connect Your Data Sources
Federating the databases you already run is Monospace's core capability. You can connect one or many, and query across them through a single governed API without ETL or replication.
In the Studio, go to Data Model → Data Sources, add a connection, and choose your connector. Enter the connection details and use Test Connection before saving.
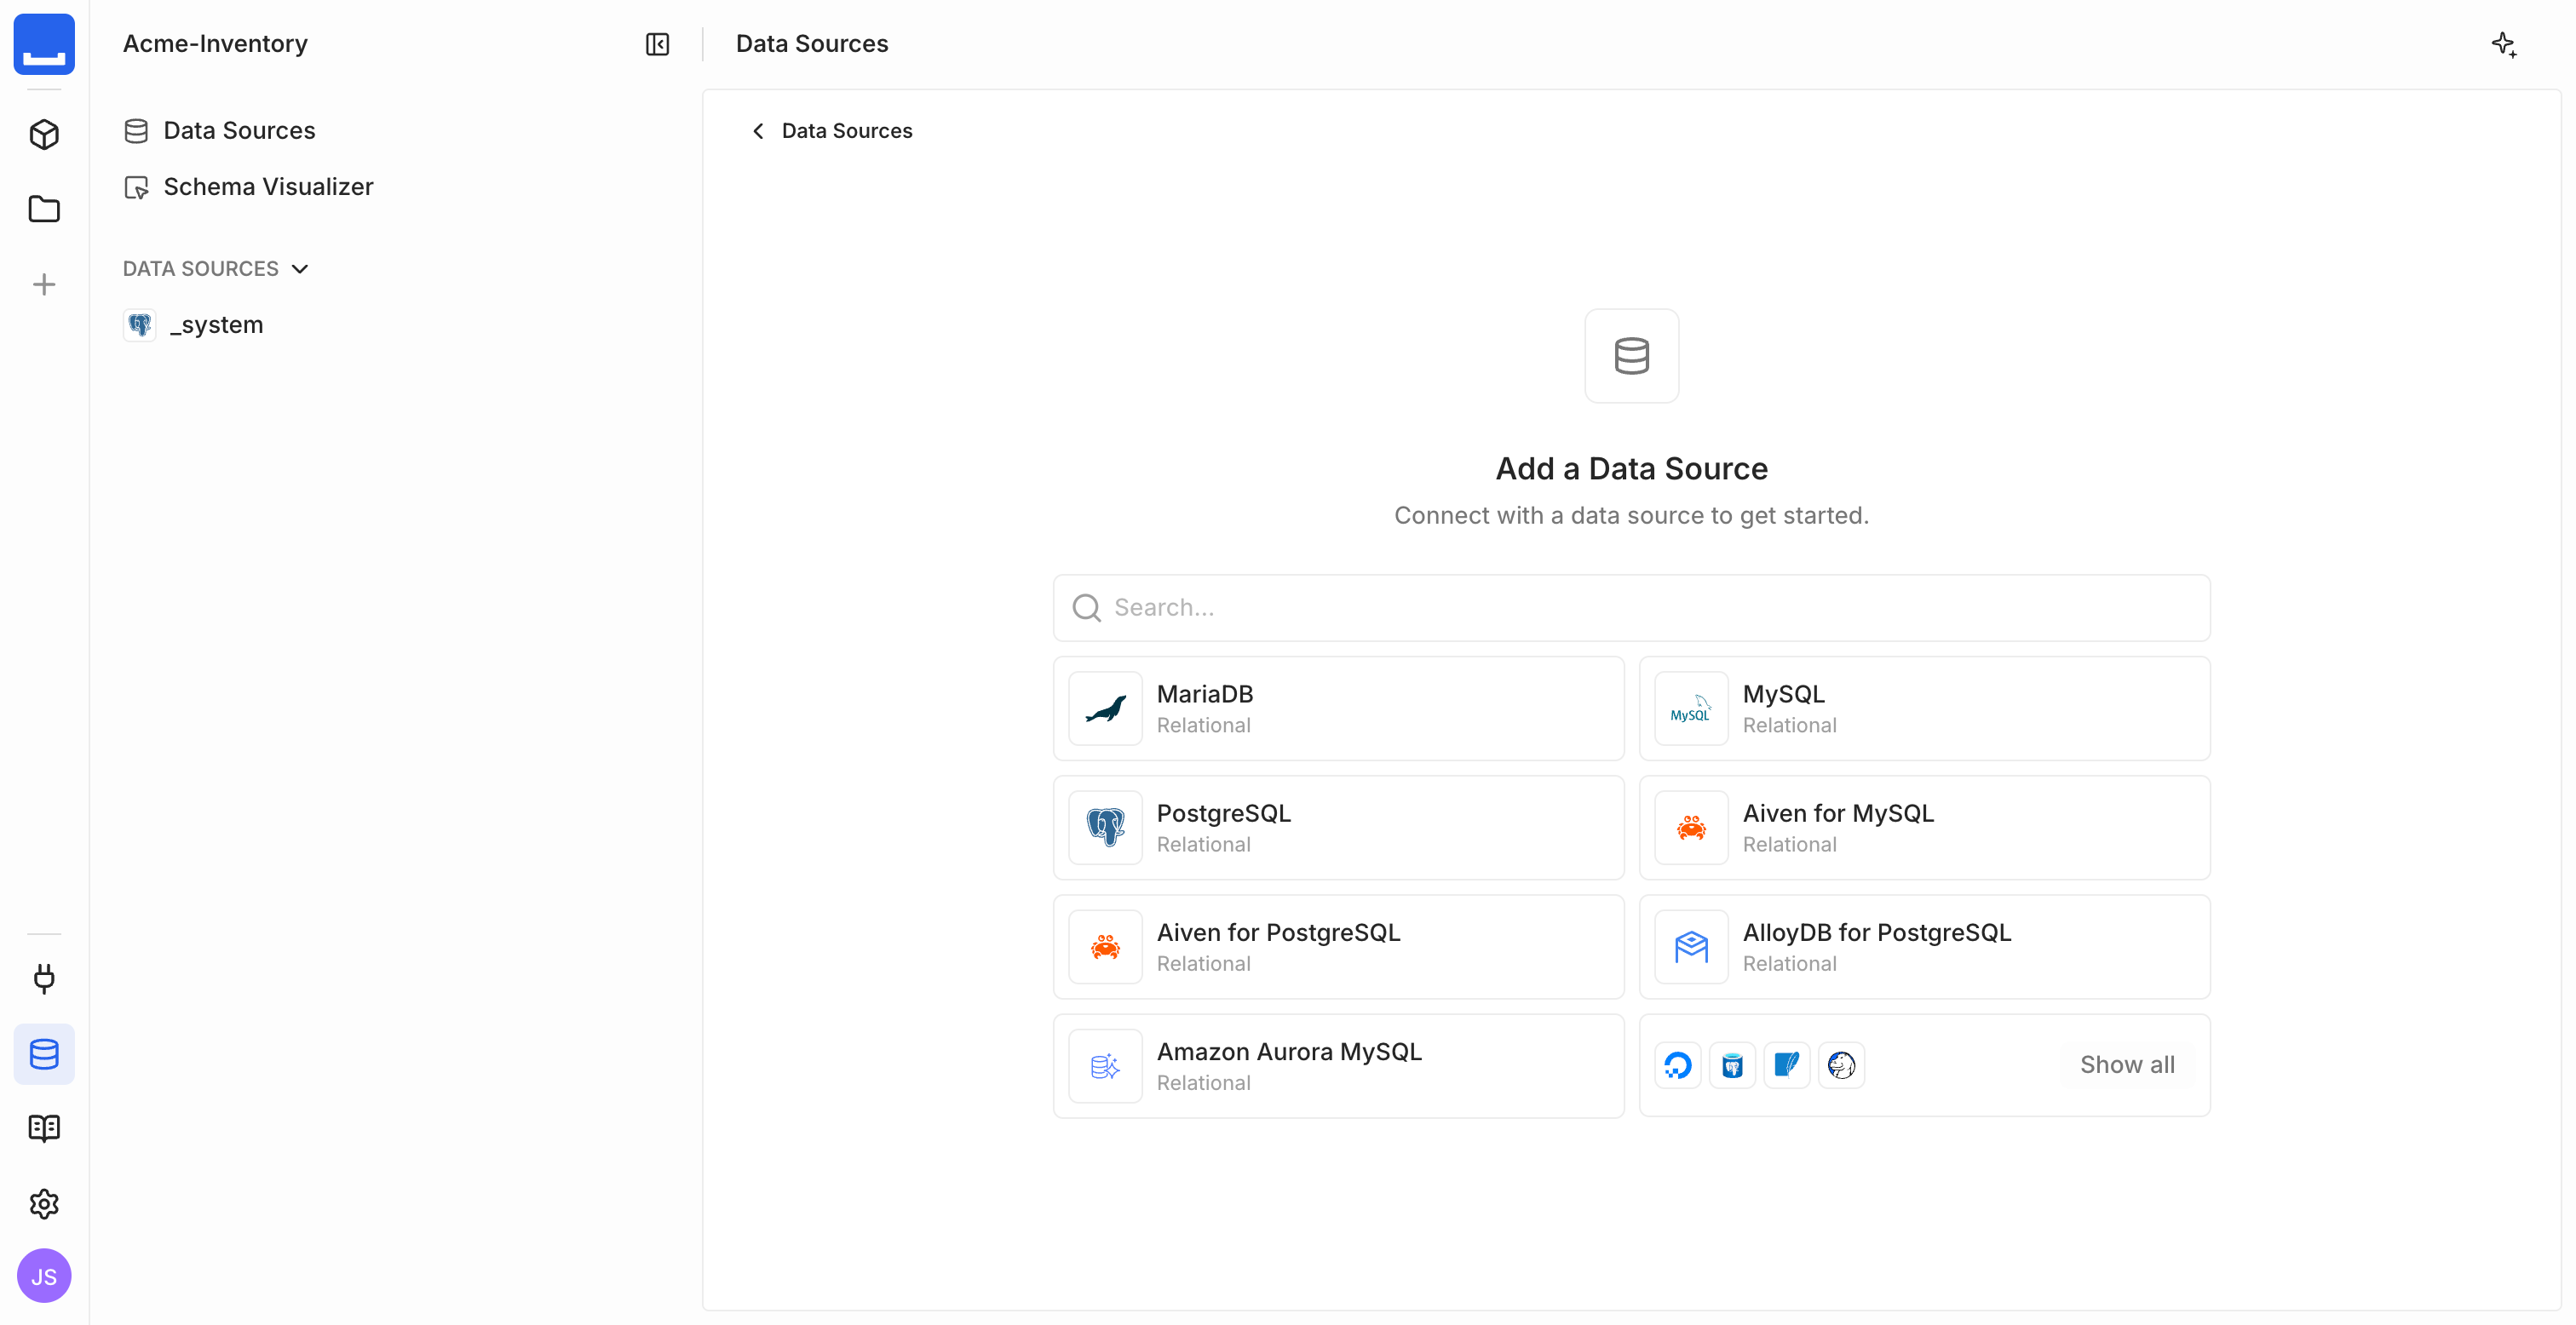
When you connect an existing database, Monospace runs Database Introspection: it reads your tables and maps them to collections automatically, with their fields and relations already in place.
3. Connect Your IDE
Your coding agent doesn't have Monospace in its training data. Left alone, it guesses at the API. Three pieces get it ready:
- an API key to authenticate
- the official skill so it knows how Monospace actually works
- the MCP server so it can read and write your real workspace.
Get an API Key
As a new admin, the fastest way to authenticate is an API key bound to your own account. This is your personal access token for the API: it inherits your admin permissions, so it can do everything you need while building.
Open your Account Settings and go to Access, then create an API key there. Give it a name and a TTL, then copy it now, since the plaintext value is shown once.
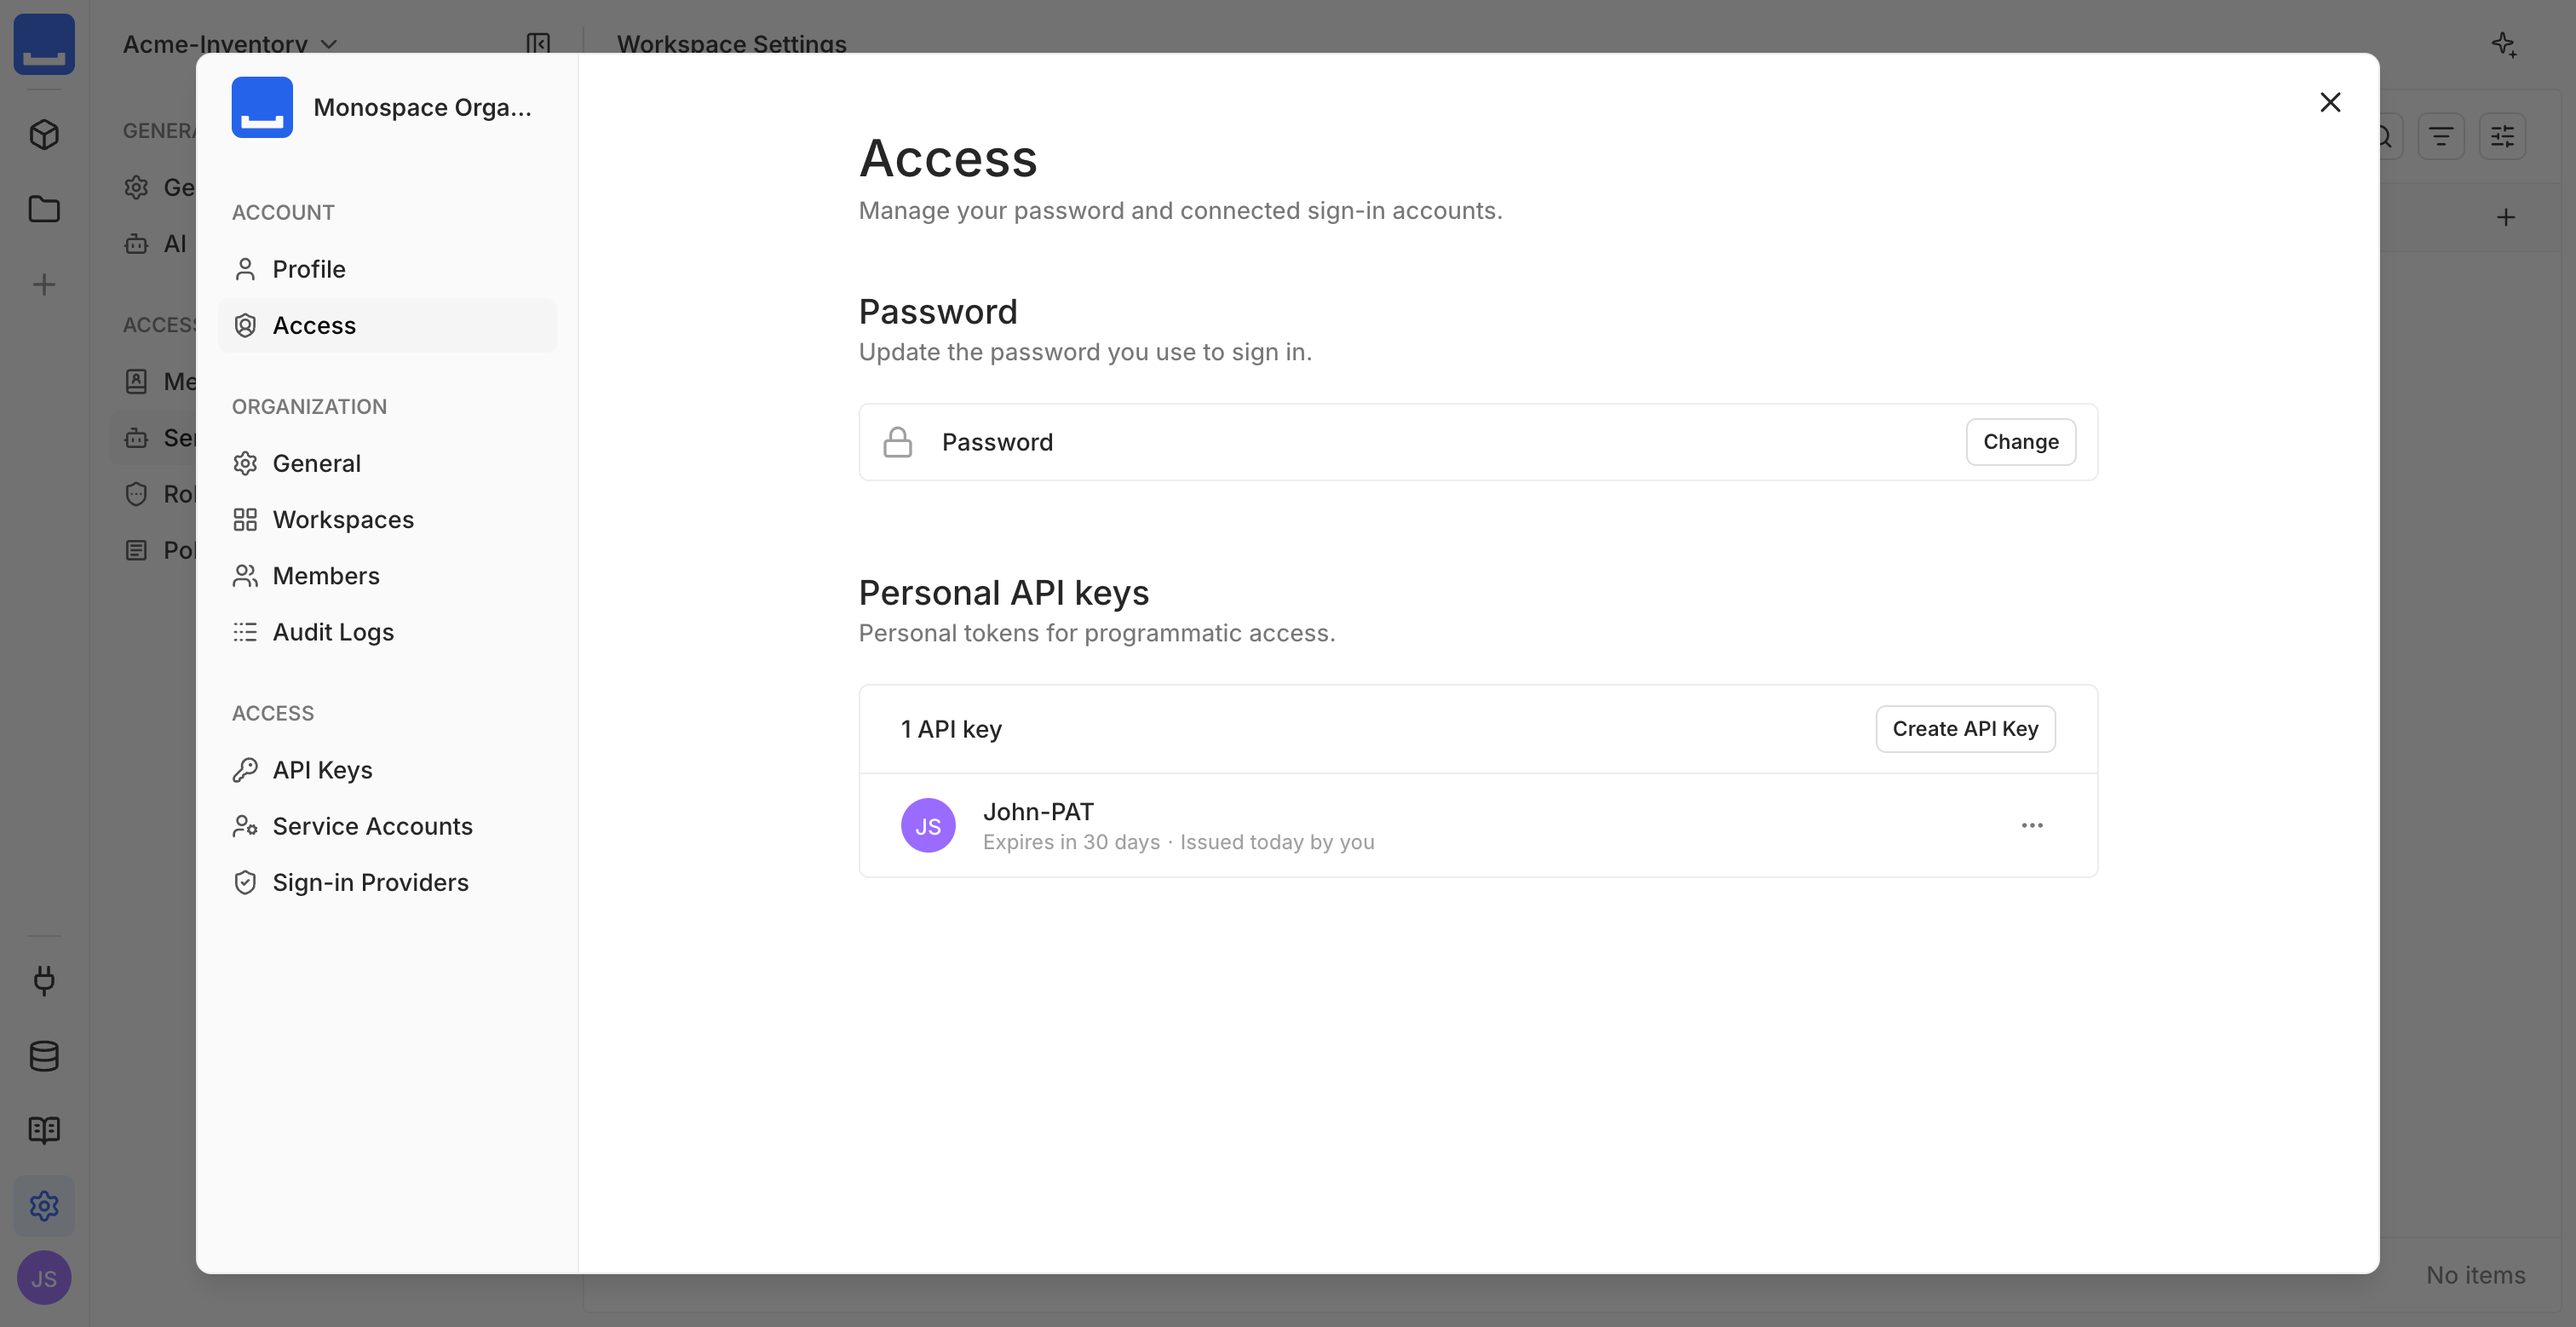
Store it as an environment variable, never in source control:
MONOSPACE_API_KEY=YOUR_API_KEY
Install the Monospace Skill
The Monospace Agent Skills bundle is the official Agent Skills package. It gives your agent the ground truth for the REST API, the typed SDK, the codegen workflow, and the MCP tools, so it writes correct calls on the first try.
Install it into Claude Code from the plugin marketplace:
claude plugin marketplace add directus/monospace-agent-skills
claude plugin install monospace@monospace-agent-skills
npx skills add directus/monospace-agent-skills, or copy skills/monospace/ into your agent's skills directory.Connect the MCP Server
Monospace serves an MCP endpoint per workspace, so your agent can query and mutate data through the same governed API as the rest of your stack. Every tool call runs under the permissions of the API key you connect with.
Add the server to Claude Code with a single command:
claude mcp add --scope project --transport http monospace \
  http://localhost:8100/api/acme-inventory/mcp \
  --header "Authorization: Bearer YOUR_API_KEY"
--scope project writes the config to a shareable .mcp.json in your project root, so anyone who clones the repo gets the same server.
If you'd rather write that file by hand, or your setup can't run the command, create it directly:
{
  "mcpServers": {
    "monospace": {
      "type": "http",
      "url": "http://localhost:8100/api/acme-inventory/mcp",
      "headers": {
        "Authorization": "Bearer ${MONOSPACE_API_KEY}"
      }
    }
  }
}
Written this way, Claude Code expands ${MONOSPACE_API_KEY} from your environment, keeping the key out of the file. For Cursor, Codex, Gemini, and the OpenAI SDKs, the Configure MCP guide has the exact per-client setup. The URL and bearer token are the same everywhere.
4. Bootstrap the Schema
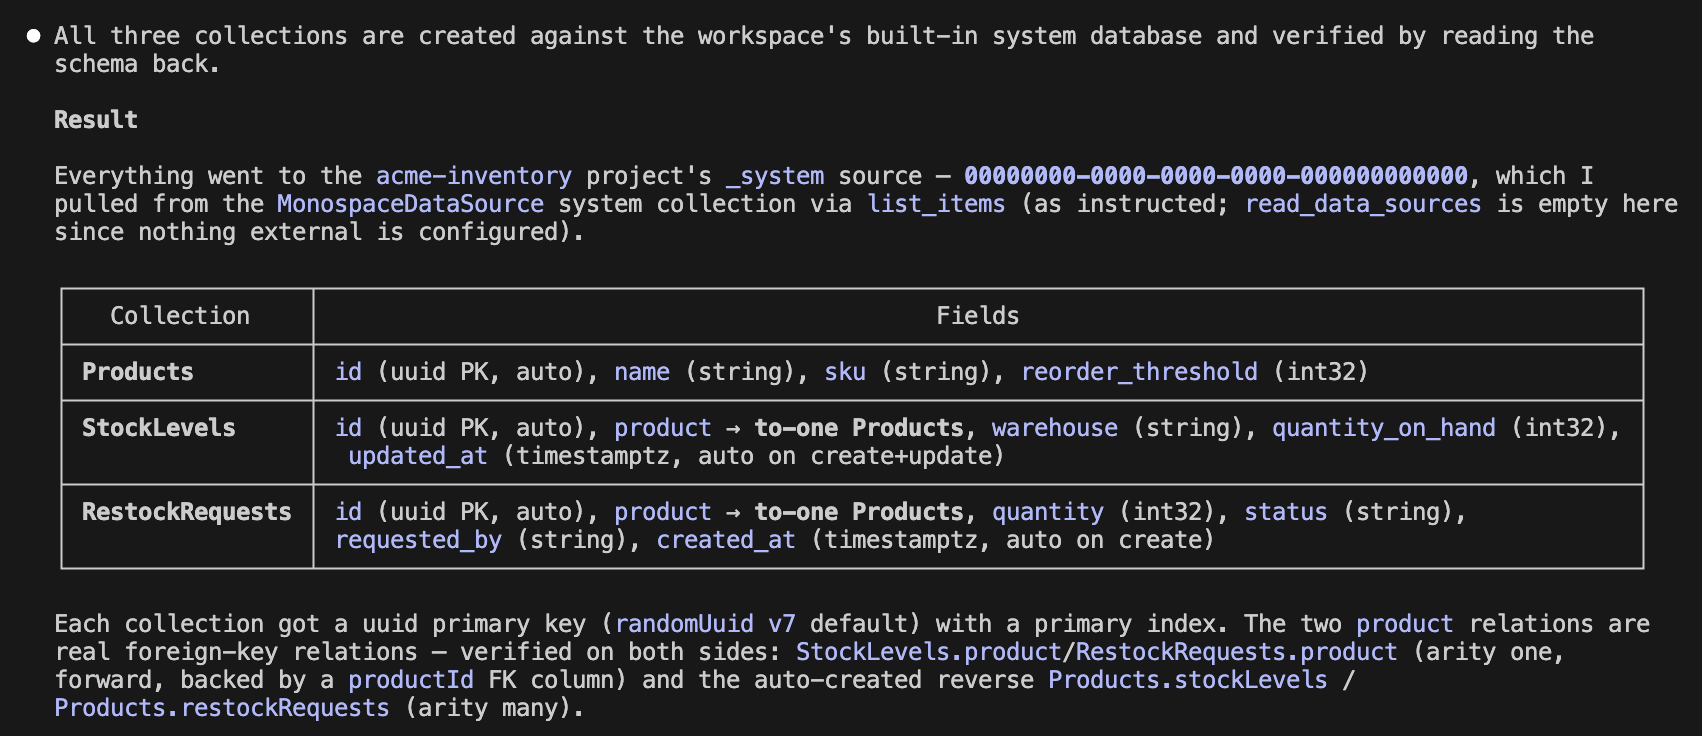
Here's where it starts to pay off. Instead of modeling collections by hand, describe the data model to your agent and let it build the schema over MCP.
In your IDE, give the agent this prompt:
Create three collections in the
acme-inventoryworkspace on its built-in database.
Products:name(string),sku(string),reorder_threshold(integer)StockLevels:product(to-one relation toProducts),warehouse(string),quantity_on_hand(integer),updated_at(timestamp)RestockRequests:product(to-one relation toProducts),quantity(integer),status(string, one ofdraft,submitted,received),requested_by(string),created_at(timestamp)Then seed five sample products with stock levels, two of them below their reorder threshold.
The agent calls read_data_sources to get the built-in database's source id, applies the model with mutate_schema, then seeds the sample data with create_items. With the skill installed, it knows the exact tools and the shape of a valid migration.
The MCP server exposes seven tools, each checked against your key's permissions:
| Tool | What it does |
|---|---|
read_schema | Inspect collections, fields, and relations |
read_data_sources | List connected data sources; include the built-in database on request |
mutate_schema | Create or alter schema |
list_items | Query items with filter, sort, and pagination |
create_items | Create one or more items |
update_item | Update a single item |
delete_item | Delete a single item |
mutate_schema can alter or drop collections and fields. Your admin key can run it while building. A deployed application never changes schema at runtime, so the scoped identity you ship with should not have that permission.5. Generate the SDK and Build
Now the payoff. Generate a client typed to your schema, then build the application against it with full autocomplete and compile-time safety.
Generate the Typed Client
Install the SDK, scaffold a config, and generate the client. The SDK Quickstart covers each step in depth.
npm install @monospace/sdk
pnpm add @monospace/sdk
yarn add @monospace/sdk
bun add @monospace/sdk
npx @monospace/sdk init
pnpm exec monospace init
yarn run monospace init
bun run monospace init
npx @monospace/sdk generate
pnpm exec monospace generate
yarn run monospace generate
bun run monospace generate
generate reads your live schema over the OpenAPI endpoint, using the same MONOSPACE_API_KEY, and writes a fully typed client. Every collection the agent created, Products, StockLevels, and RestockRequests, is now a typed property on the client.
Build the Application
The console's entire data layer is two typed SDK calls — no hand-rolled API, no ORM. Sketch them in a scratch file, src/restock.ts, to see the shape before your agent builds the UI around them.
List the products that have dropped below their reorder threshold, lowest stock first:
import { createClient } from './generated/monospace';

const client = createClient({
  url: 'http://localhost:8100',
  workspace: 'acme-inventory',
  apiKey: process.env.MONOSPACE_API_KEY,
});

const stockLevels = await client.StockLevels.readMany({
  fields: ['id', 'quantity_on_hand', { product: ['id', 'name', 'sku', 'reorder_threshold'] }],
  sort: [{ quantity_on_hand: { direction: 'asc' } }],
});

// Monospace filters compare a field to a value, not one field to another, so the
// reorder check runs here rather than in the query.
const lowStock = stockLevels.filter((level) => {
  const threshold = level.product?.reorder_threshold;
  return threshold != null && level.quantity_on_hand != null && level.quantity_on_hand < threshold;
});
The return type narrows to the exact fields you request, including the nested product relation and its reorder_threshold. See Filtering for value operators like _lt and _in, and Field Selection for nested relations.
reorder_threshold — runs in your code after the read, as above.File a restock request when an operator acts on a shortage:
const request = await client.RestockRequests.createOne({
  data: {
    product: { _connect: { key: { id: lowStock[0].product.id } } },
    quantity: 100,
    status: 'submitted',
    requested_by: 'restock-console',
  },
  fields: ['id', 'status', 'quantity'],
});
The data object is typed against your schema: required fields are enforced, and unknown fields are rejected.
Now hand your agent this prompt to wrap those two calls in a clean page. It writes the real app files — a server component and a server action — so the src/restock.ts scratch can be deleted once it's done:
Using the generated
@monospace/sdkclient in./generated/monospace, build a single-page restock console with Next.js (App Router). Use no UI component library and only light custom CSS.
- In a server component, instantiate the client with
MONOSPACE_API_KEYfrom the environment and queryStockLevels, selecting each product'sname,sku, andreorder_threshold; keep the rows whosequantity_on_handis below the product'sreorder_threshold, sorted lowest stock first.- Render the results as a table: product, SKU, warehouse, and quantity on hand.
- Give each row a "Request restock" button that files a
RestockRequestsitem (quantity 100, statussubmitted) through a server action.- When a request is filed, show a brief confirmation toast (inline, no extra library) and list recently filed
RestockRequests(product, quantity, status, and when they were filed) in a second table below.- Style it with a system font, generous spacing, and a clean card-and-table look.
Because the client runs in a server component, your API key stays on the server and never ships to the browser. Start the dev server:
npm run dev
pnpm dev
yarn dev
bun run dev
Open http://localhost:3000 and there it is: every product below its reorder threshold, each with a button that files a restock request.
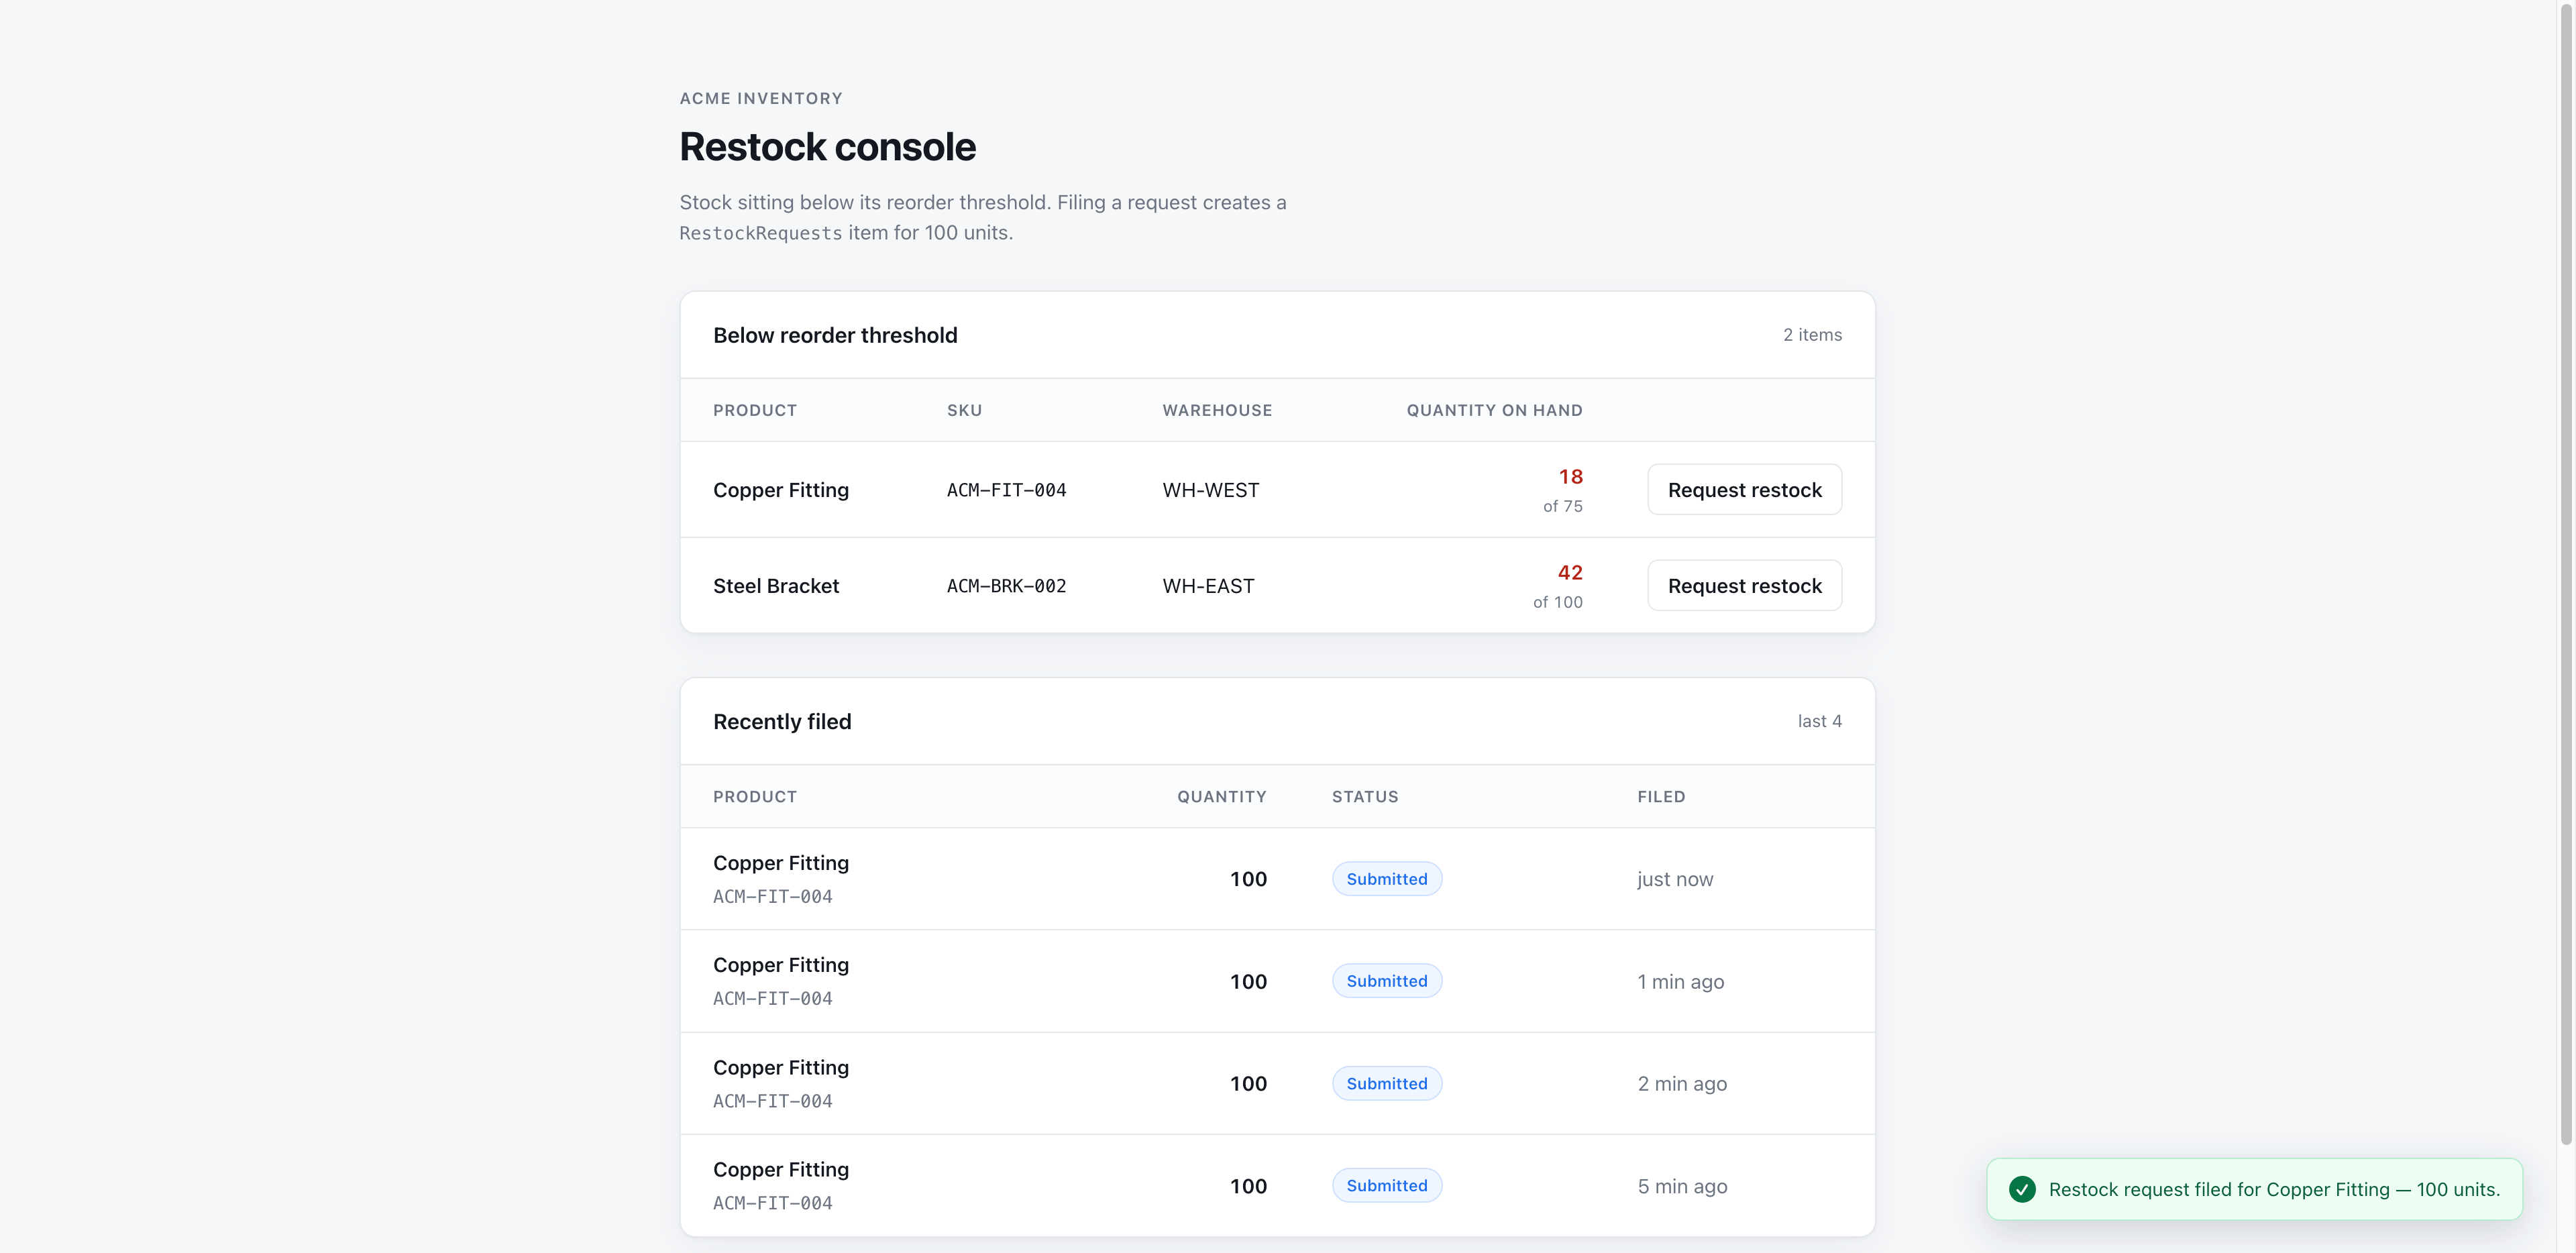
That's a working application, governed end to end, in about an hour.
Bonus: Deploy with a Service Account
Your personal admin key is perfect for building. To run the console for real, give it its own identity, a service account, scoped to exactly what the running application needs and nothing more.
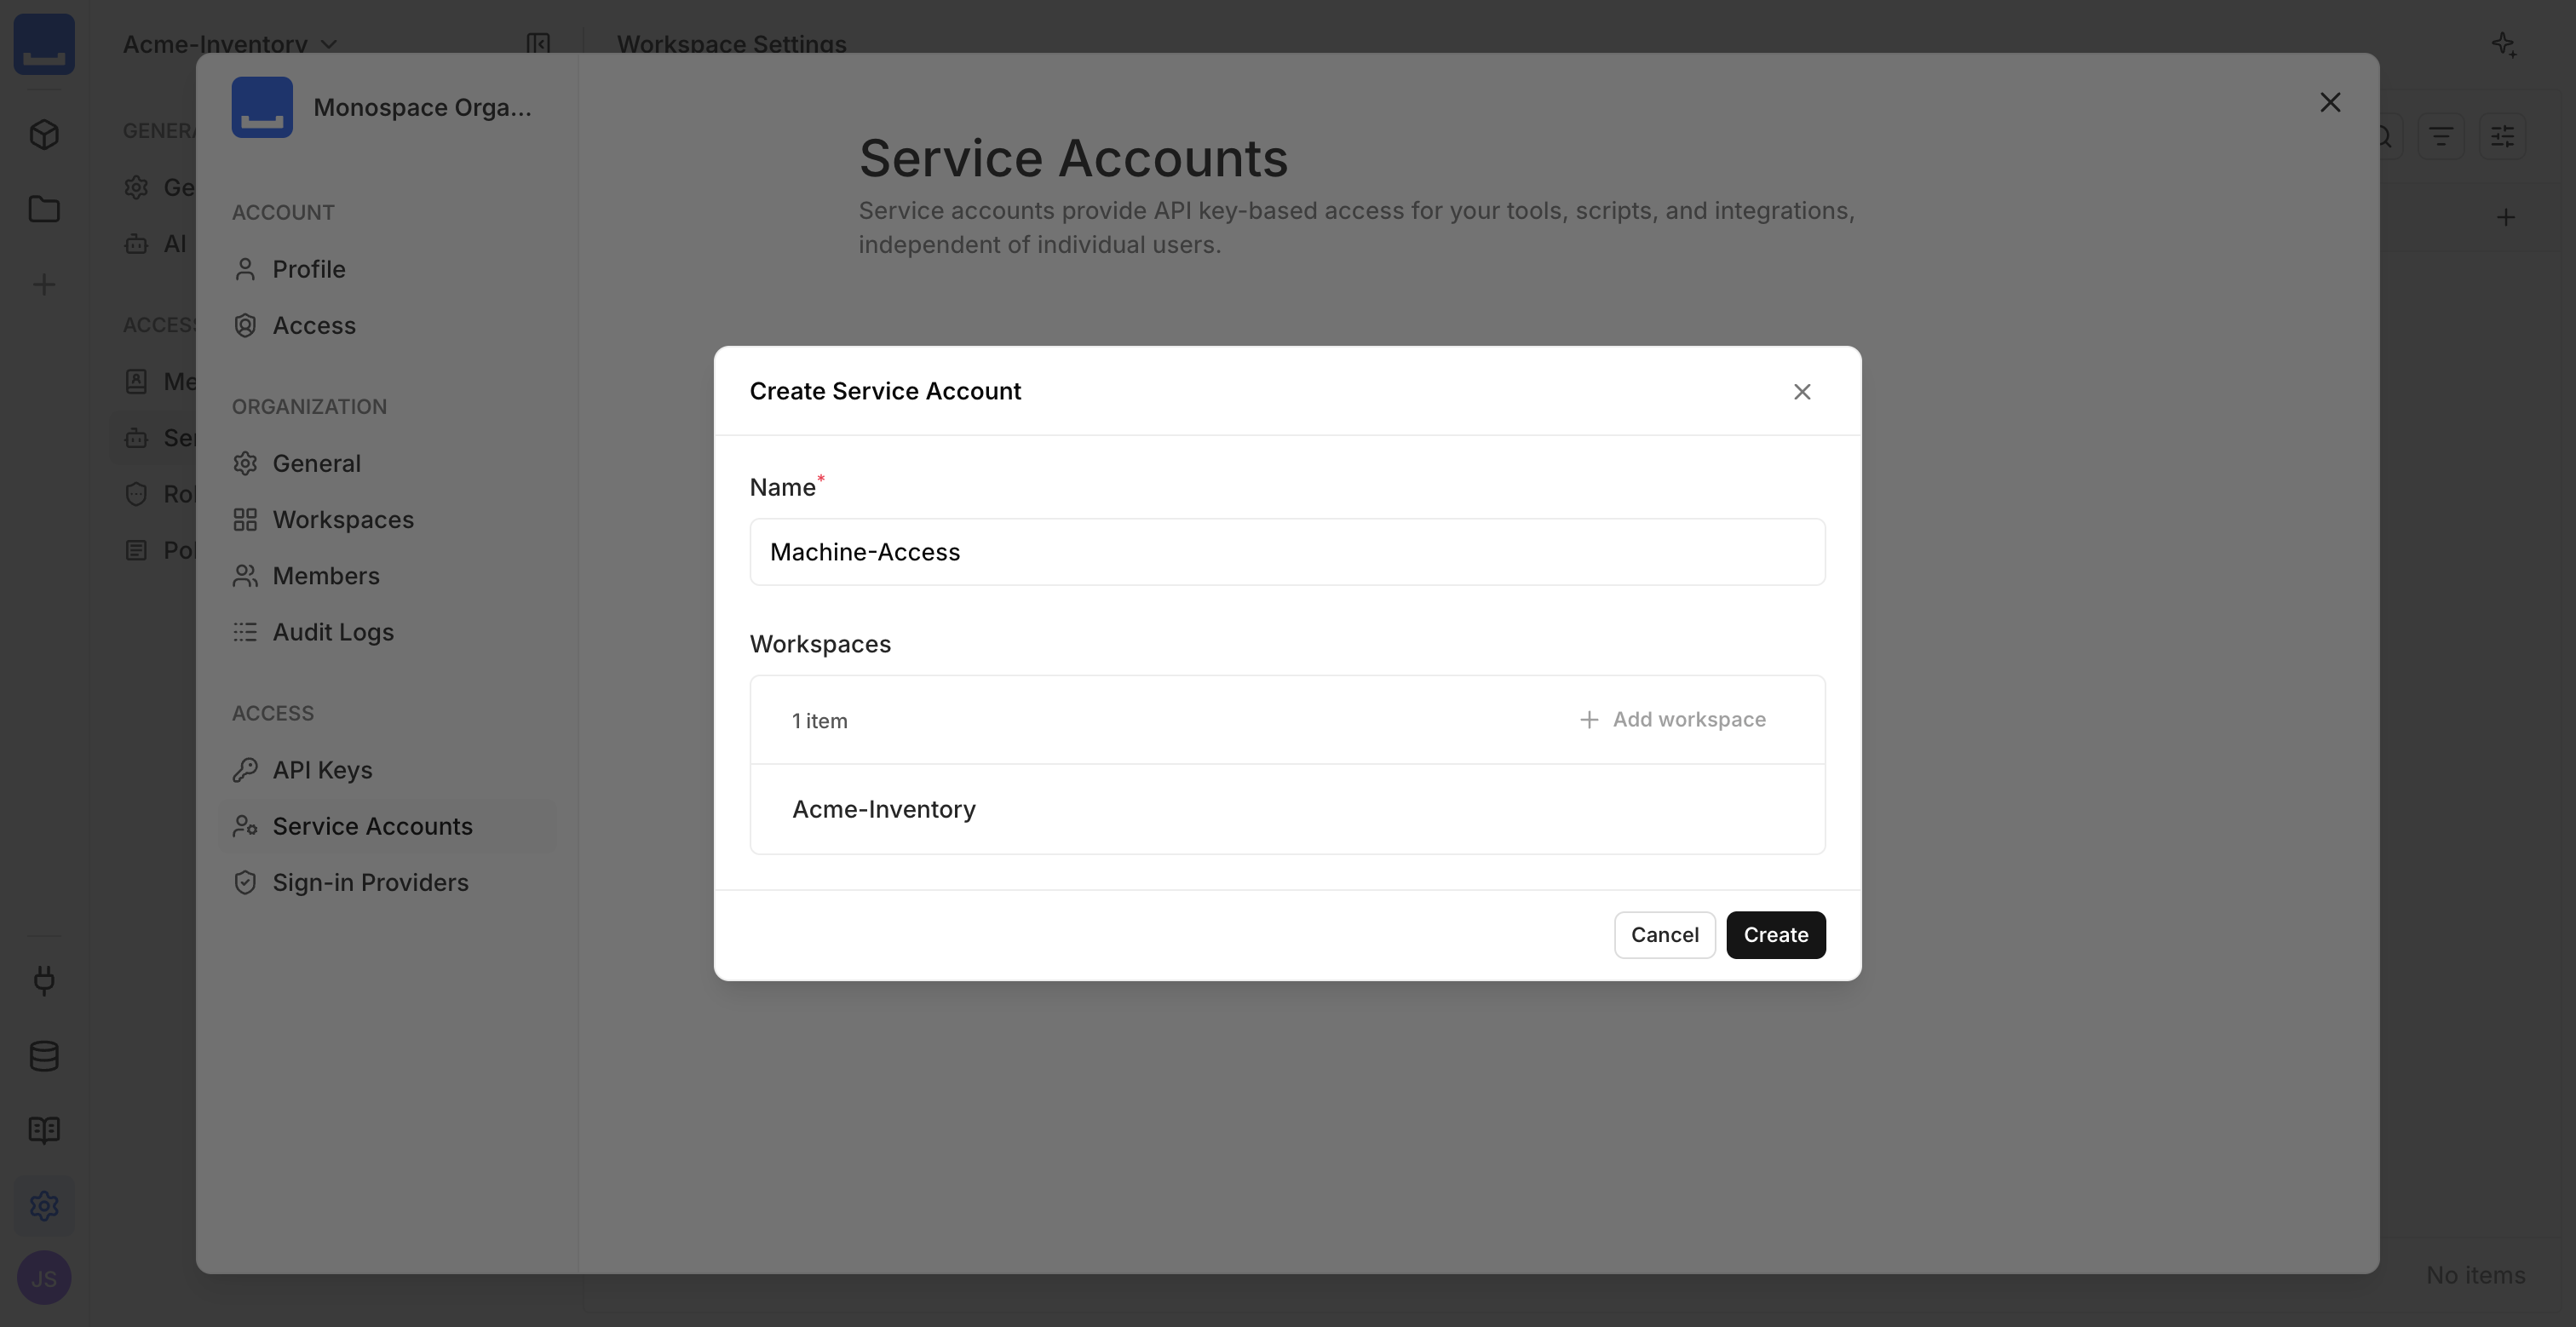
Create a Service Account
A service account is a non-human identity that the deployed application acts as. Create one for the restock console so its access is separate from any person's login and survives you rotating your own key.
Scope It with a Role and Policy
Access in Monospace is built from roles (containers for policies), policies (where permissions are defined), and entitlements (system-level permissions). Assign the service account a role whose policy grants only what the console needs at runtime:
| Grant | Why the application needs it |
|---|---|
Read on Products, StockLevels | List low-stock items |
Create and Read on RestockRequests | File and display restock requests |
dataModel:read | Let the SDK generator read the schema at build time |
Notably absent: dataModel:edit and ai:mcp. The deployed console reads and writes items through the SDK. It never mutates schema or calls the MCP server, so its identity can't either.
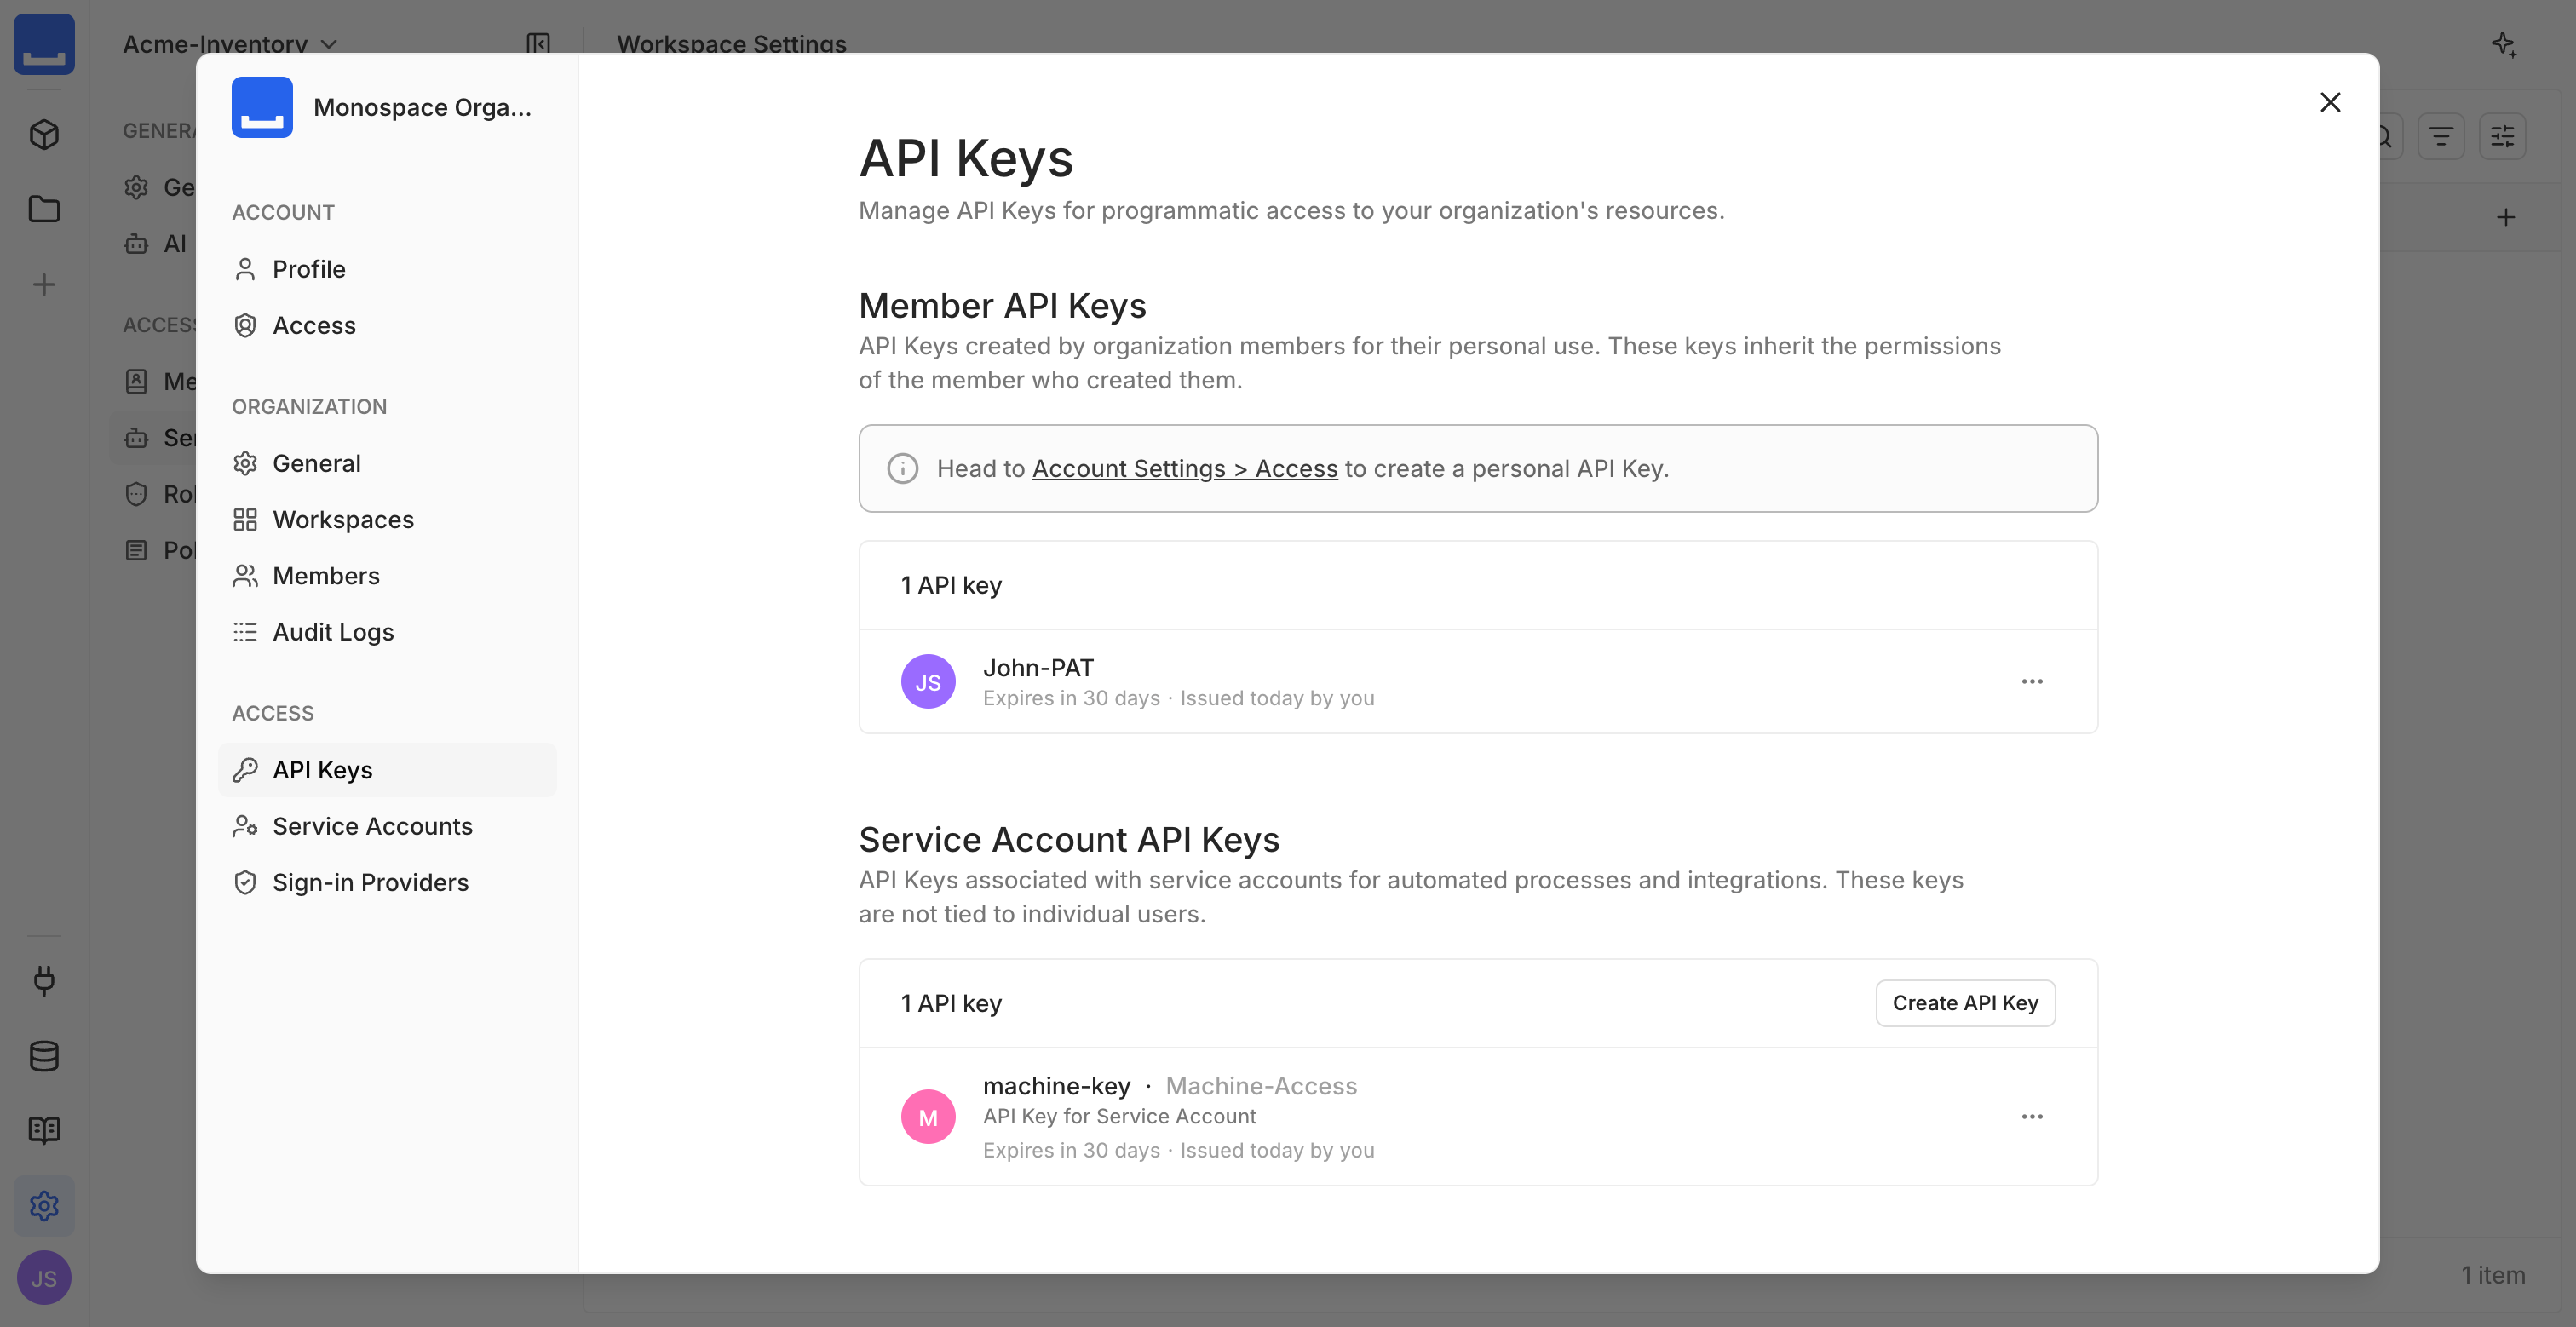
Mint Its API Key
Create an API key belonging to the service account, then set it as MONOSPACE_API_KEY in your deployment environment in place of your admin key.
Next Steps
- Quickstart — the full Docker Compose setup for starting Monospace
- Configure MCP — per-client setup for Cursor, Codex, Gemini, and the OpenAI SDKs
- SDK Quickstart — codegen, the typed client, and every CRUD method
- Access Control — roles, policies, and entitlements in depth
- Use Cases — other ways teams put Monospace to work